
D Day Series:The Pegasus Bridge Museum: Where D-Day's Liberation Story Begins.
/
What was the airborne paratroopers’ job on D Day?
With the D Day seaborne invasion planned for daybreak of the 6th June, there needed to be protection of both the left and right flanks and this was to be done by three airborne divisions just after midnight. Guarding the right flank in the Cotentin Peninsula (as seen from the sea) was the responsibility of the 82nd and 101st, Airborne Divisions, totalling 13,000 troops. The left flank, principally, the area around the Caen Canal and the River Dives, was to be the responsibility of the British 6th Airborne Division. With both flanks secured, it was planned to land by sea 176,475 men together with 1,500 tanks and over 18,000 other vehicles.
The British 6th Airborne Division had three tasks;
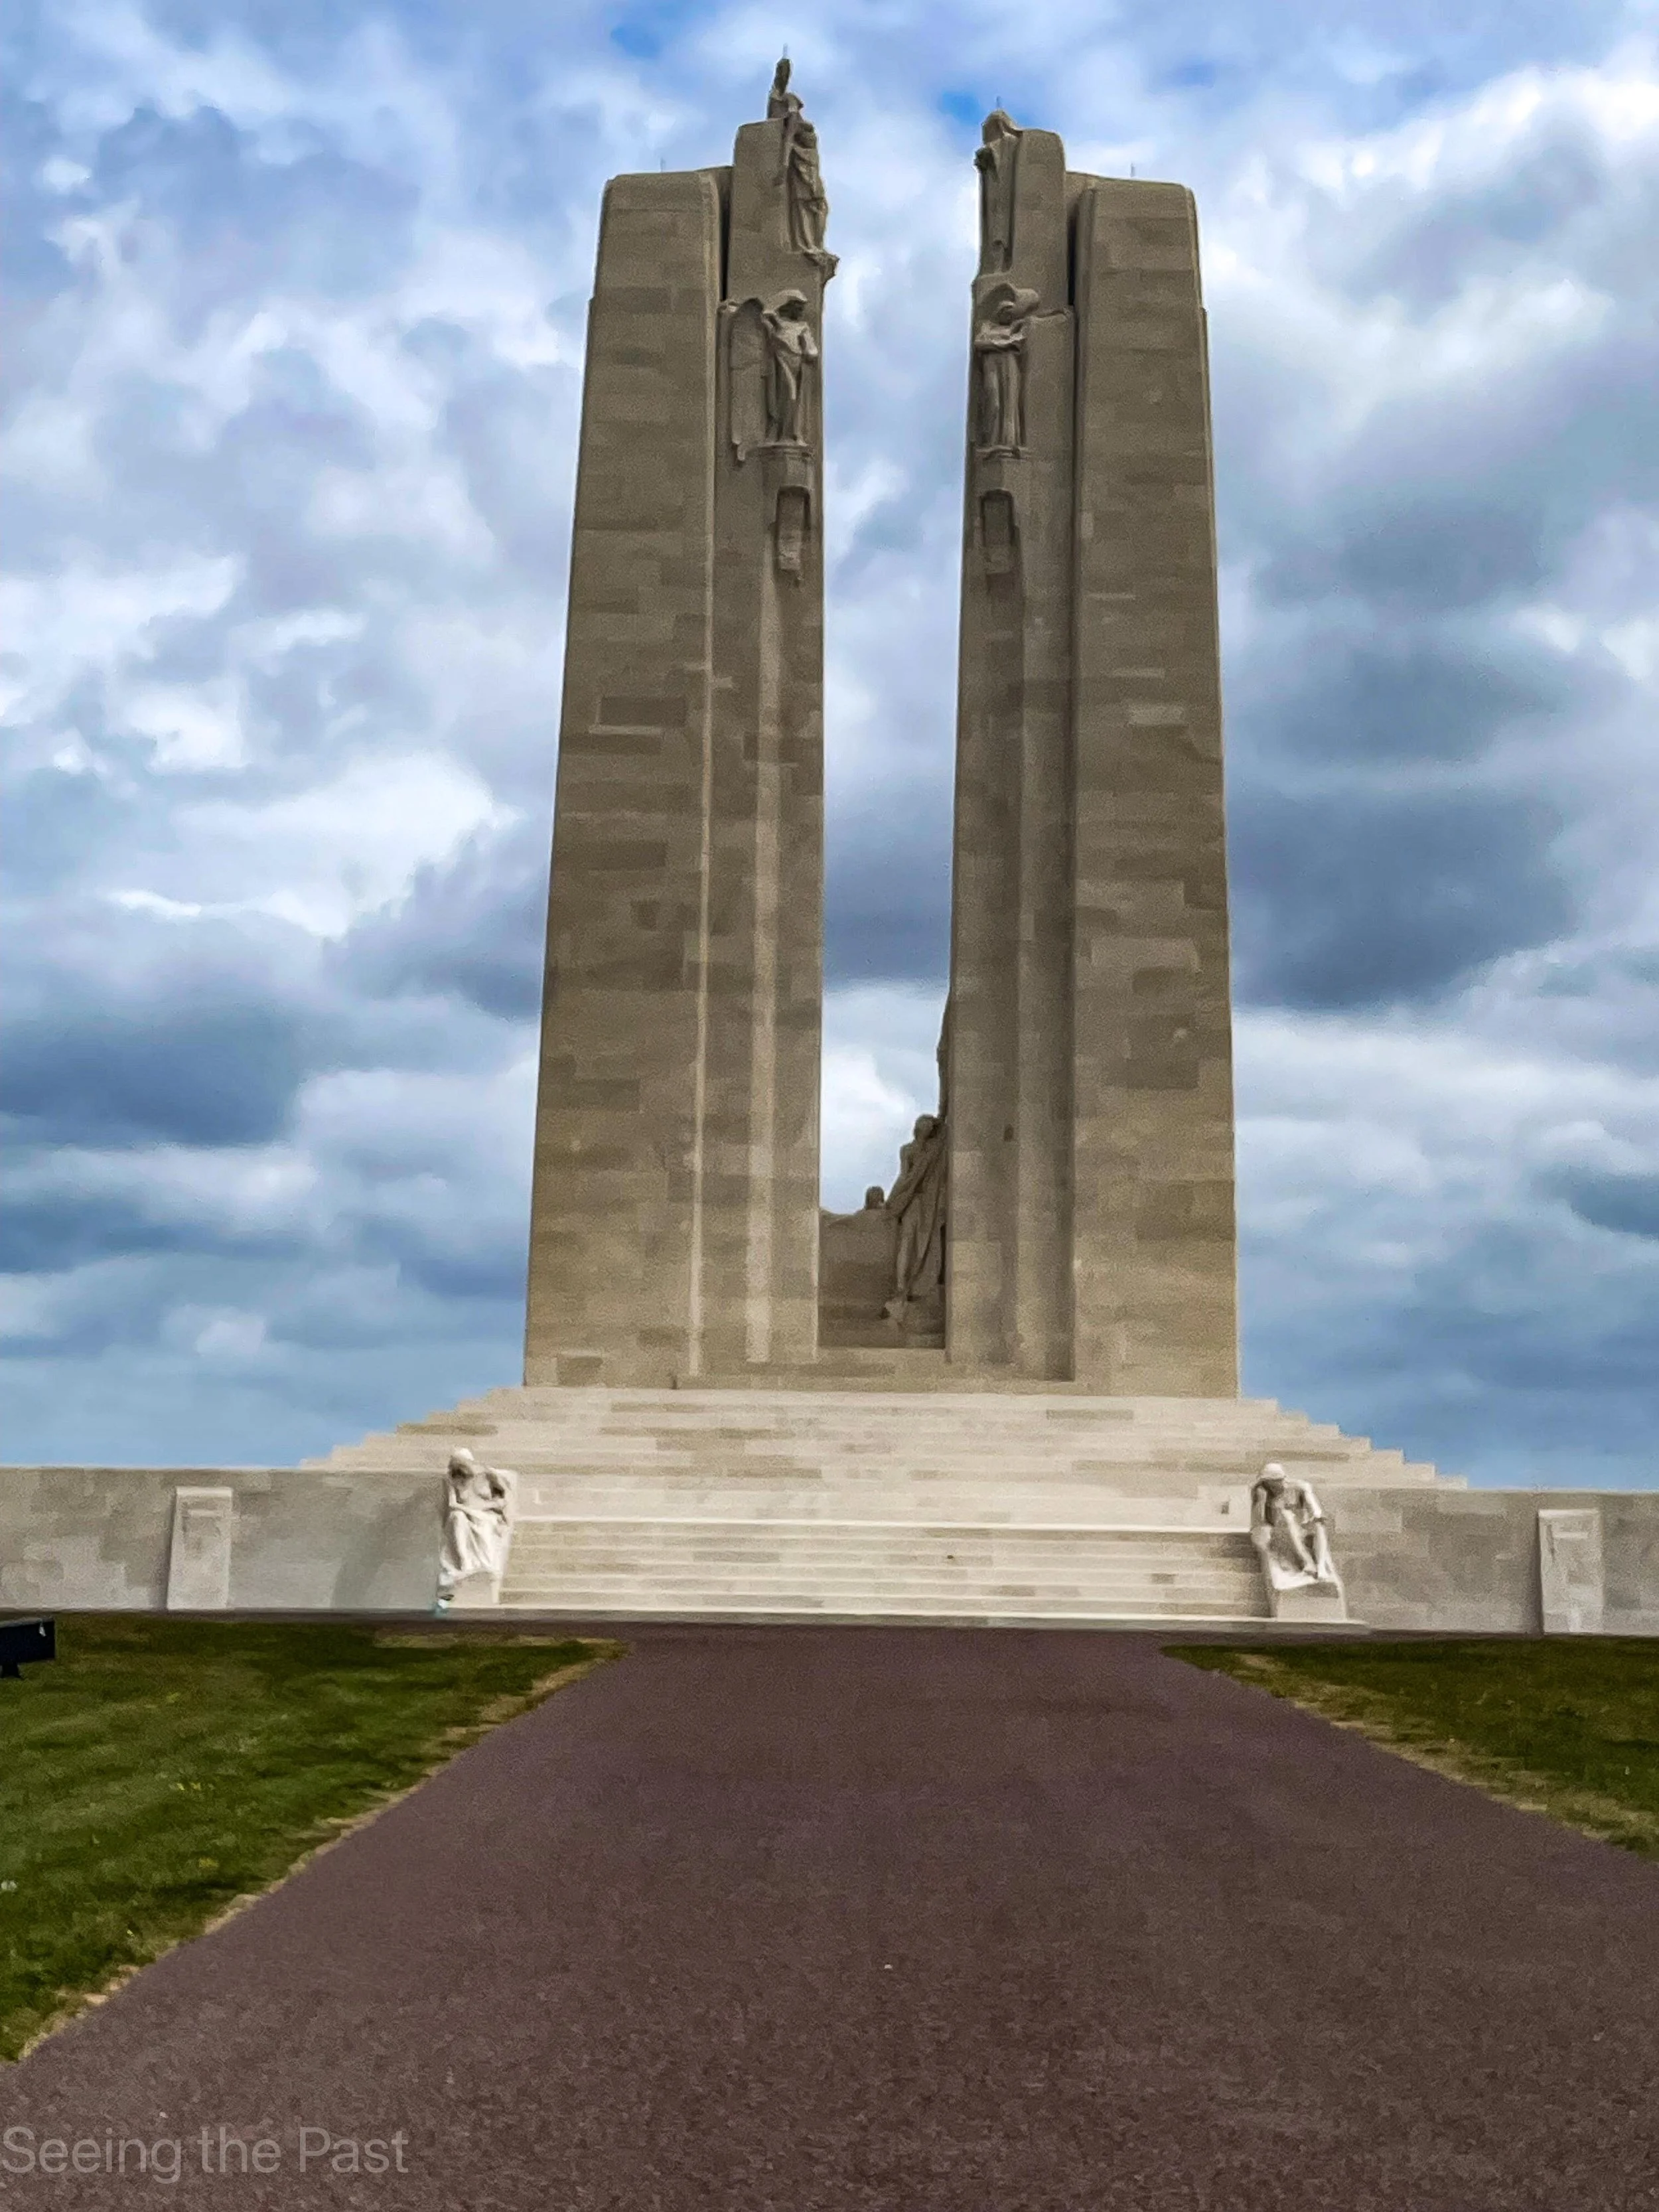
Capture and secure the two bridges over the Caen Canal and the River Orne, at Benouville and Ranville. This would mean that the Germans would not be able to use the bridges to come across to halt the D Day Beach landings. It would also prevent them from blowing up the bridges to prevent future Allied incursions into enemy territory as the Allied invasion expanded. After the success at Benouville, the bridge was to become known as “Pegasus Bridge”.
The destruction of Merville battery with its four casements of large guns that would wreak havoc on the assault craft and their troops as they tried to land on their designated beach. As these guns could shoot14,000 yards it was essential that they were silenced!
The destruction of four bridges over the River Dives in order to delay the advance of enemy reinforcement reacting to the landings.
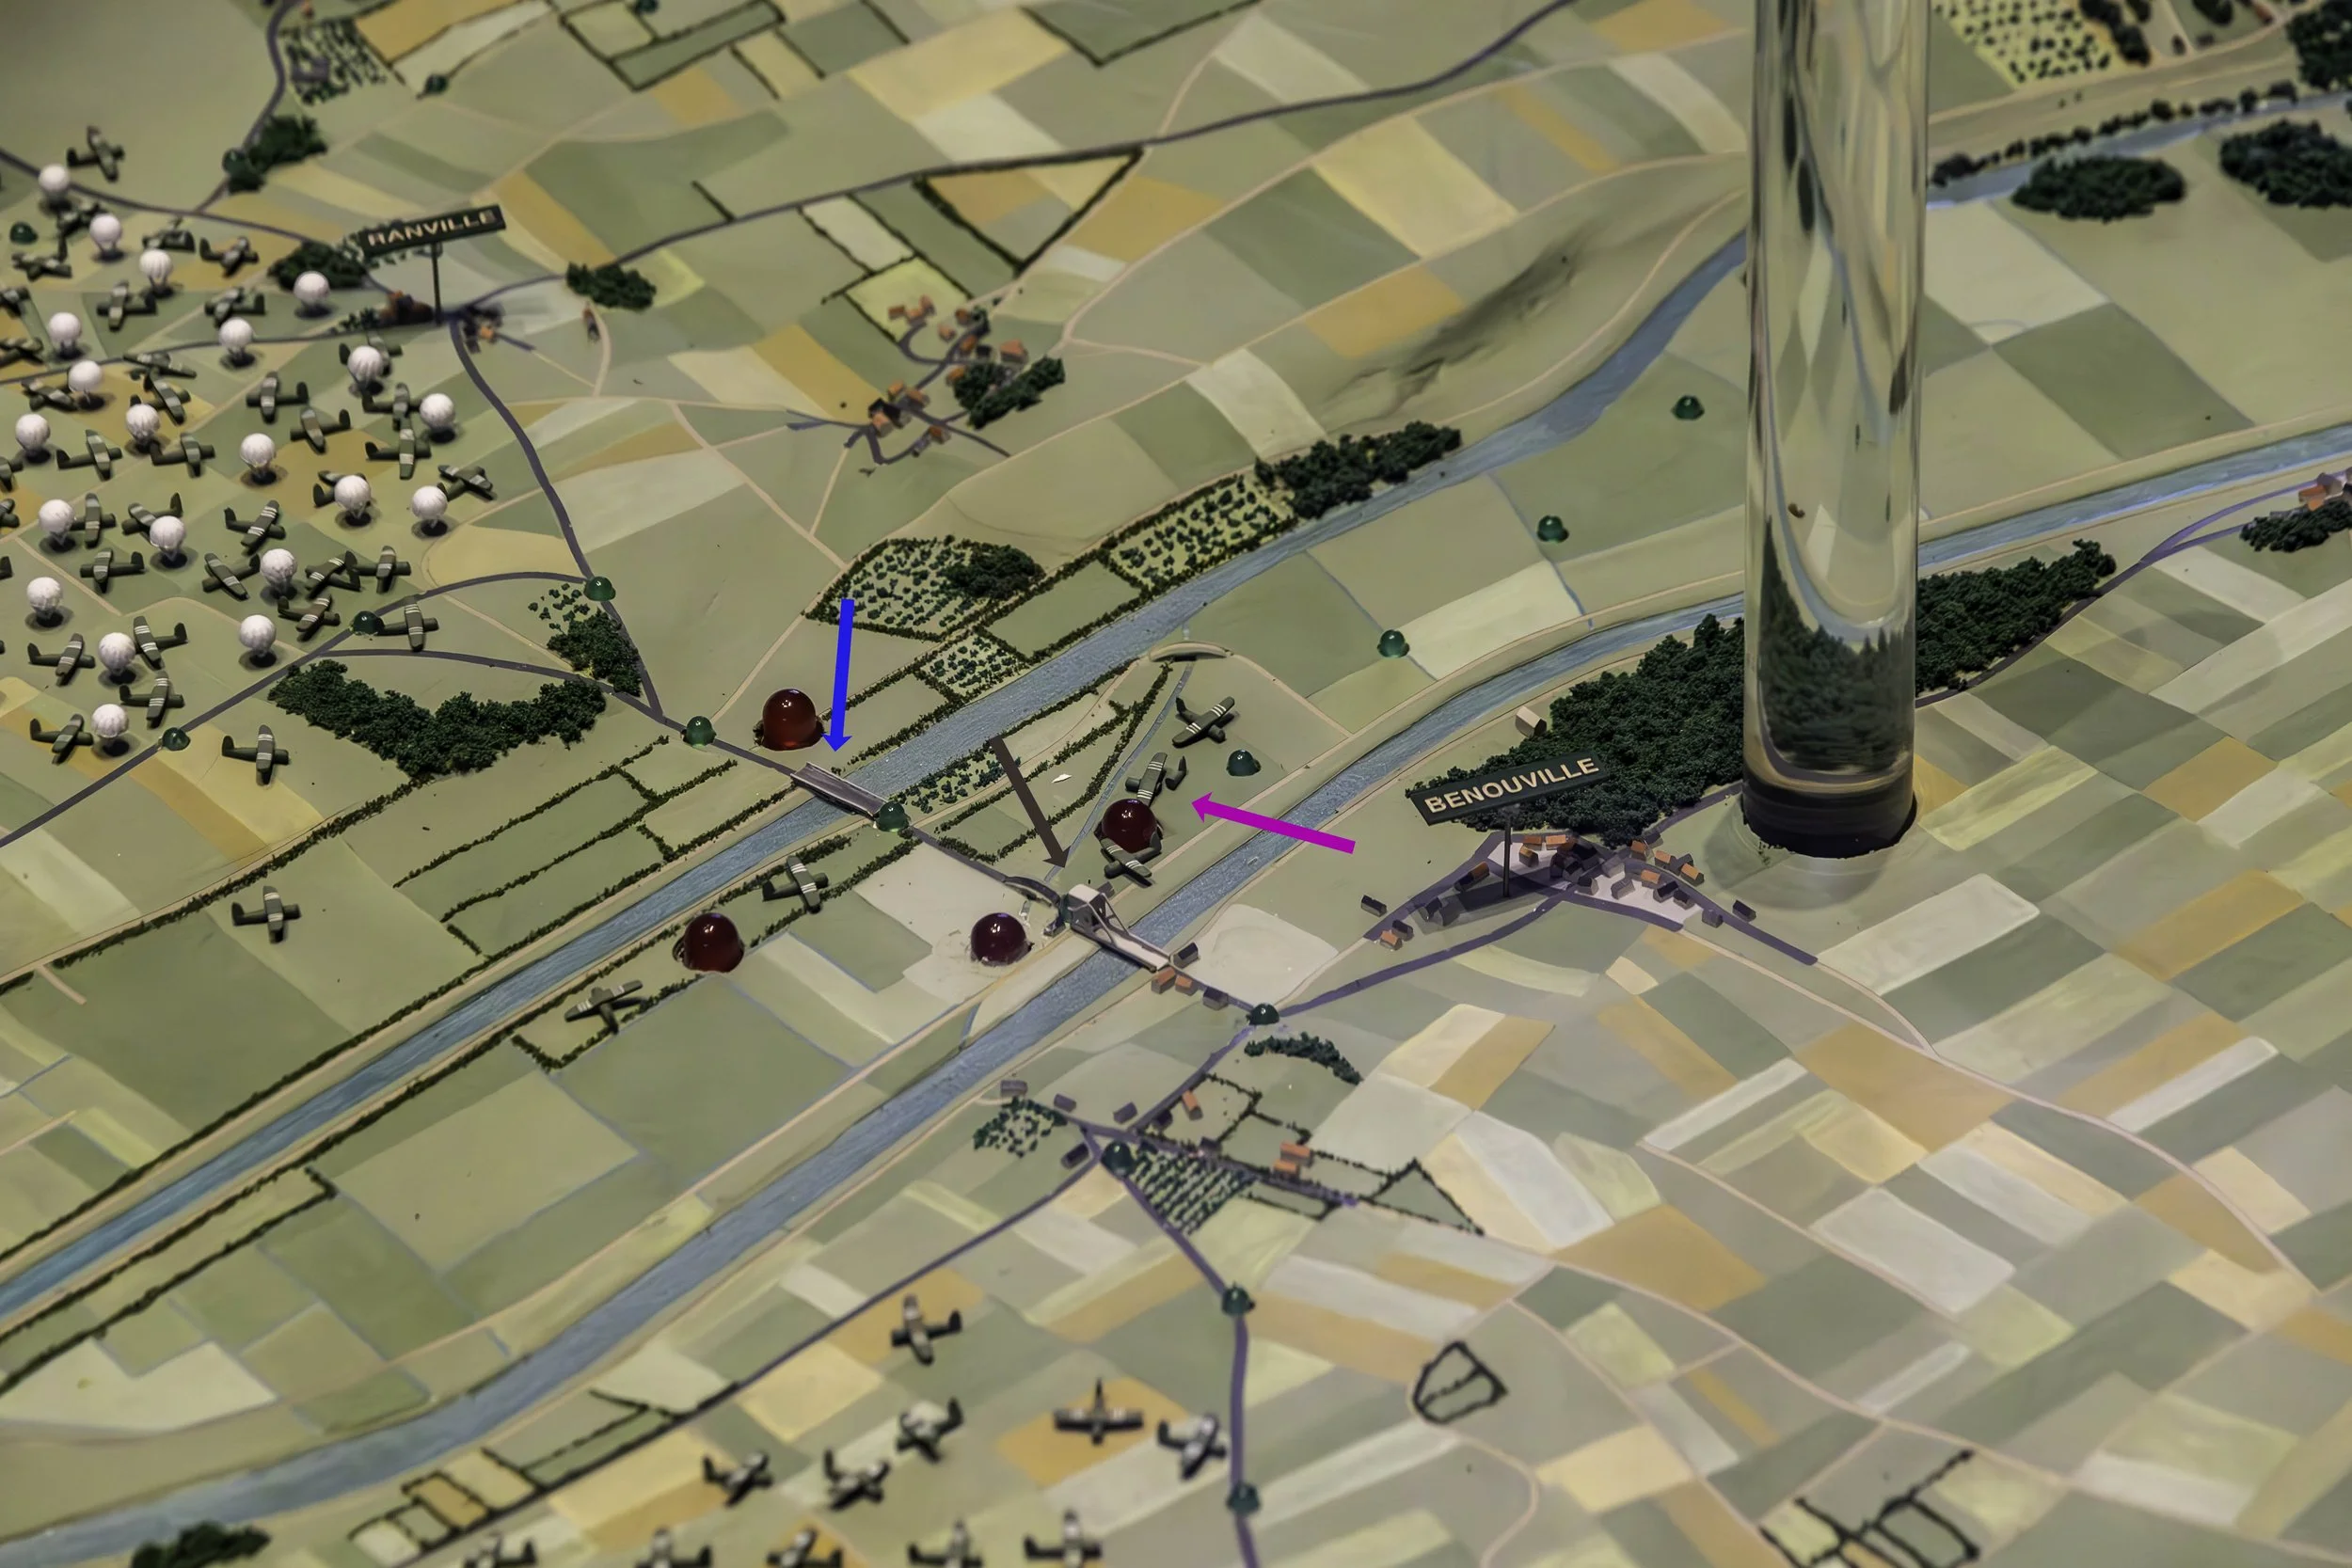
Below is a section of the amazing map/model in the centre of the museum. The Brown arrow points to Pegasus Bridge and the pink arrow points to where the gliders landed, right next to the bridge. The blue arrow points to theRanville Bridge over the River Orne.
The incredible story of the raid on Pegasus Bridge
At 22.30 hours on June 5th, the mission to capture Pegasus Bridge began. Major John Howard of the D Company of the Second Battalion, Oxford & Buckinghamshire Light Infantry (Ox & Bucks), had ordered his men to board 6 Horsa gliders, at RAF Tarrant Rushton. Each glider was to carry a platoon and a small group of engineers whose job was to make safe any explosives that the enemy had attached to the bridges. Each glider was attached by a long wire to a Halifax bomber and was to be released some way from the target to glide down silently to surprise the enemy. It was thought that any noise from the Halifax bombers would be ignored by German troops on the ground as just another bombing raid over occupied France. Even the landing of the gliders was to be a highly dangerous part of the mission due to the reception that Rommel, the German commander had planned for them.

Above and below; a replica of a Horse Glider at the museum.


You can go inside to imagine what it must have been like.
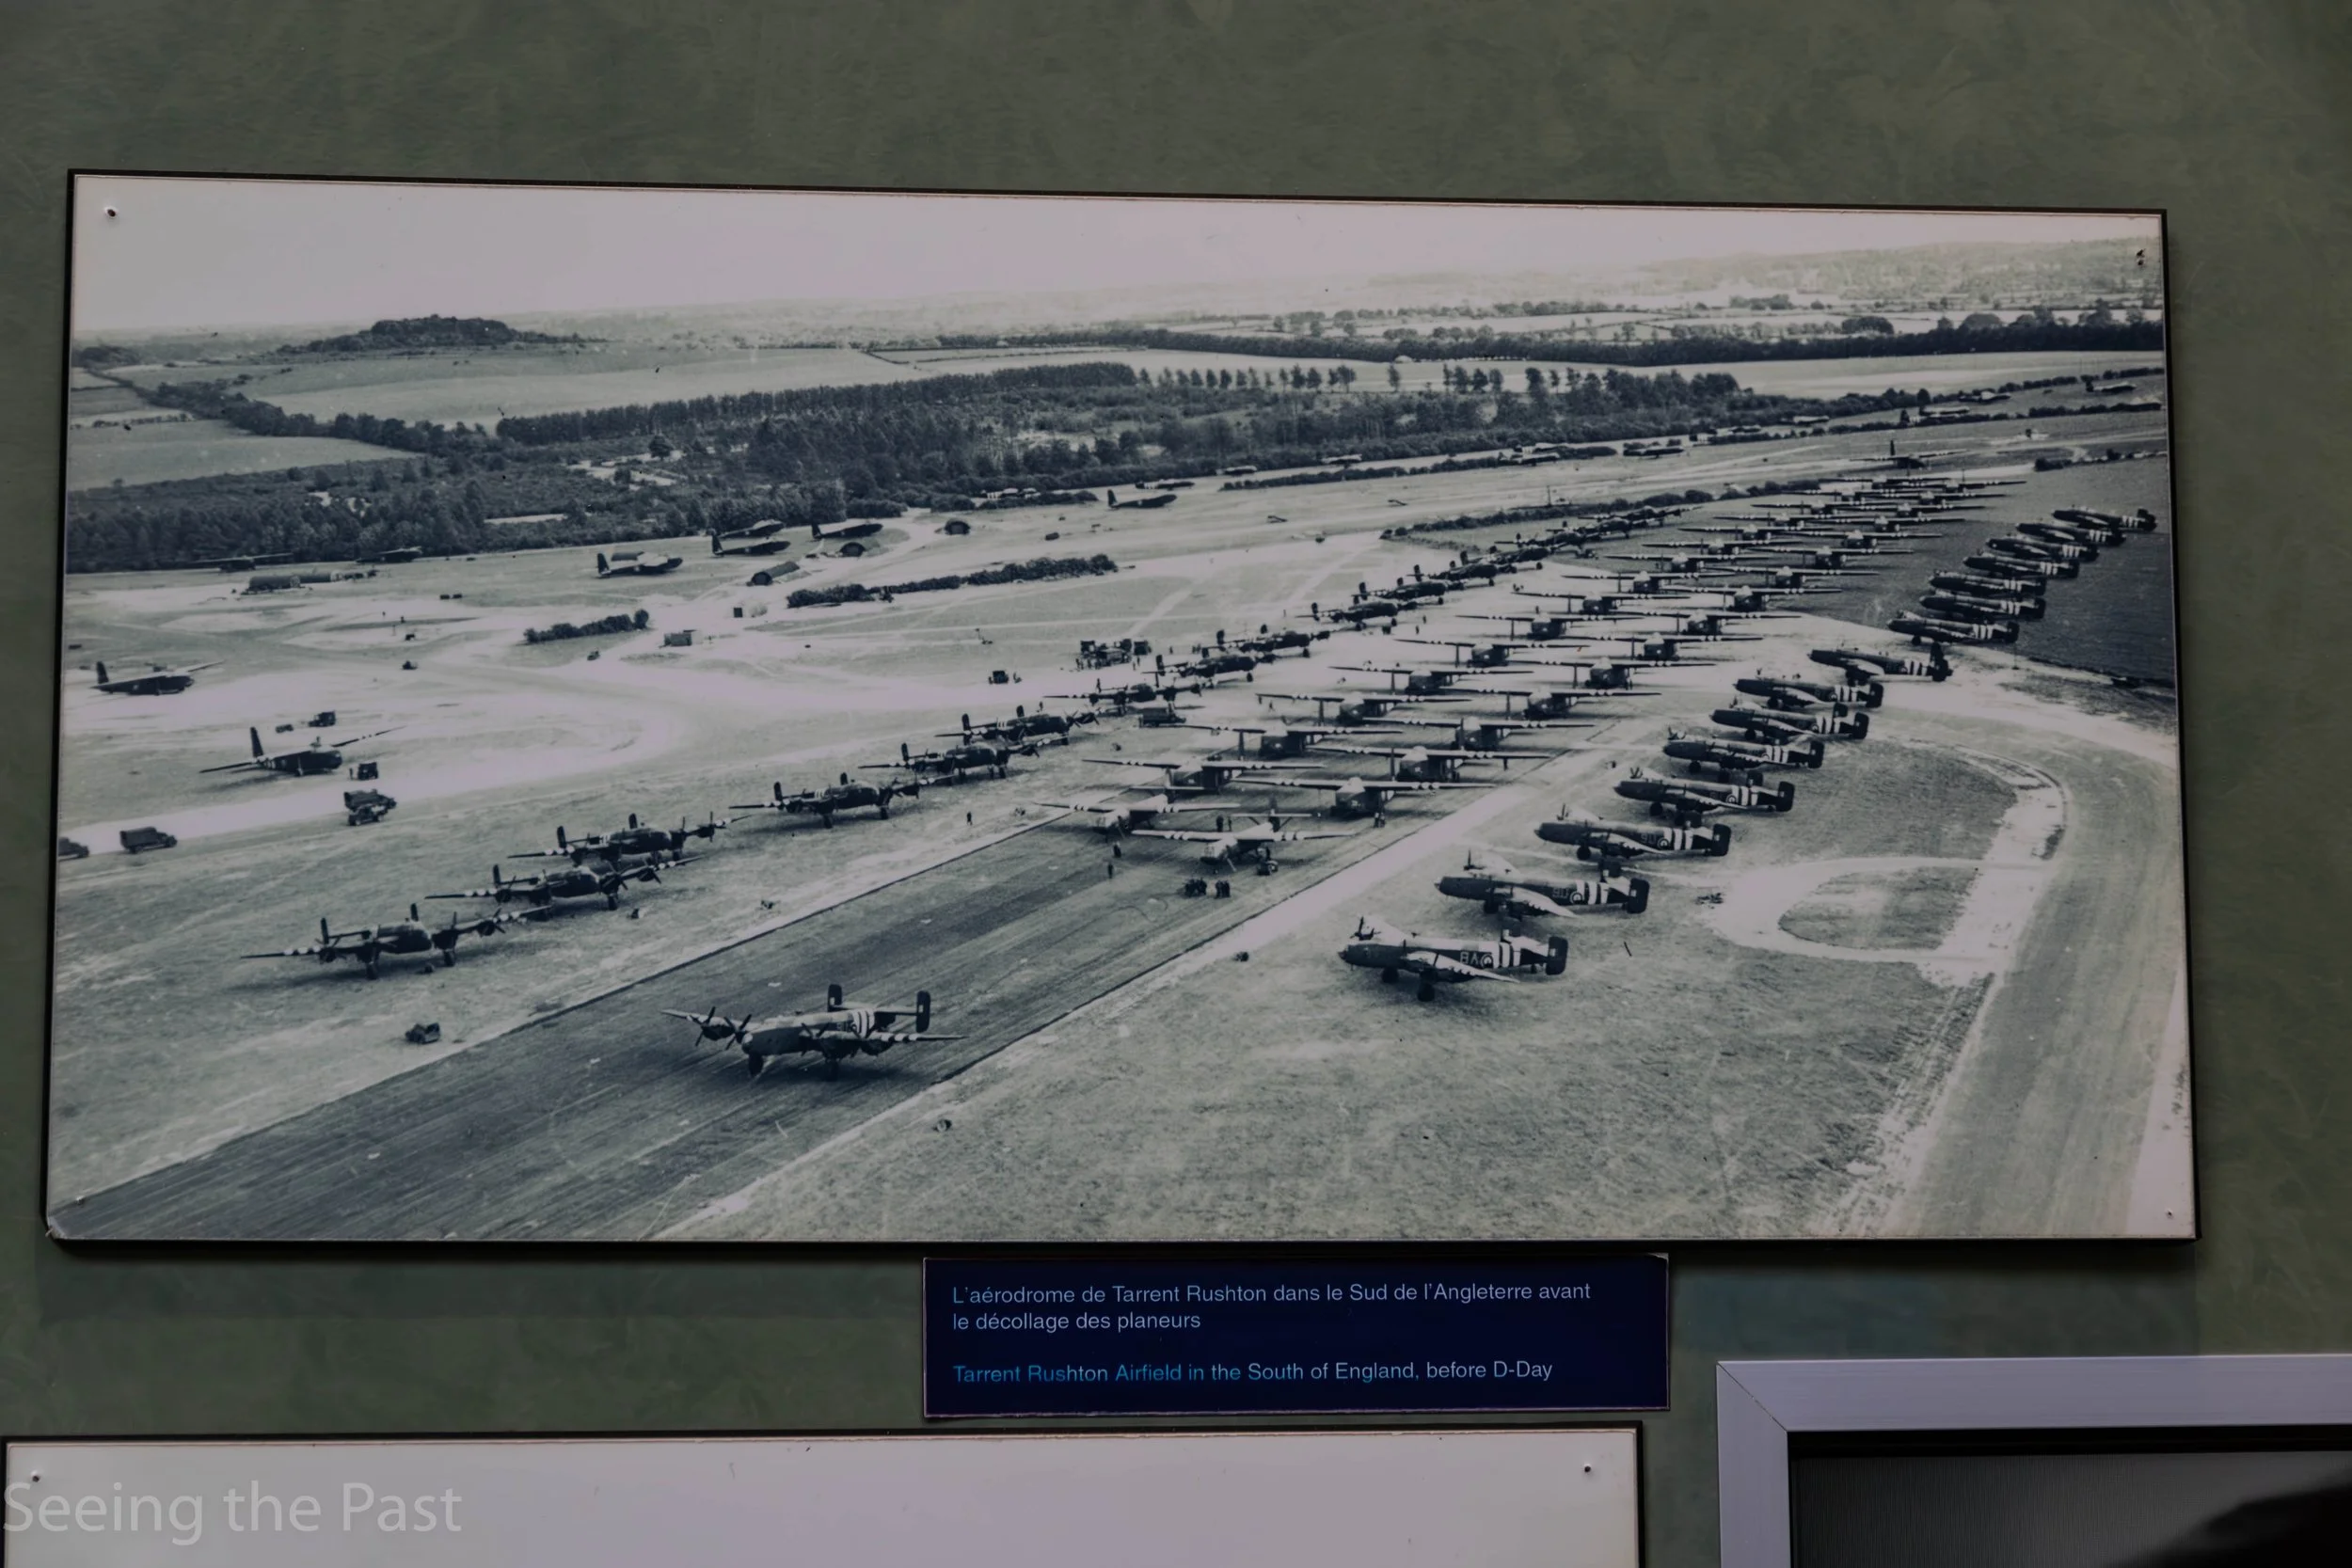
Above; On the wall of the museum is this brilliant photo of the gliders at Tarrant Ruston ready to go.

Above; The power of a cup of tea. The caption that goes with this photo in the museum is, “A last cup of tea before departure”.
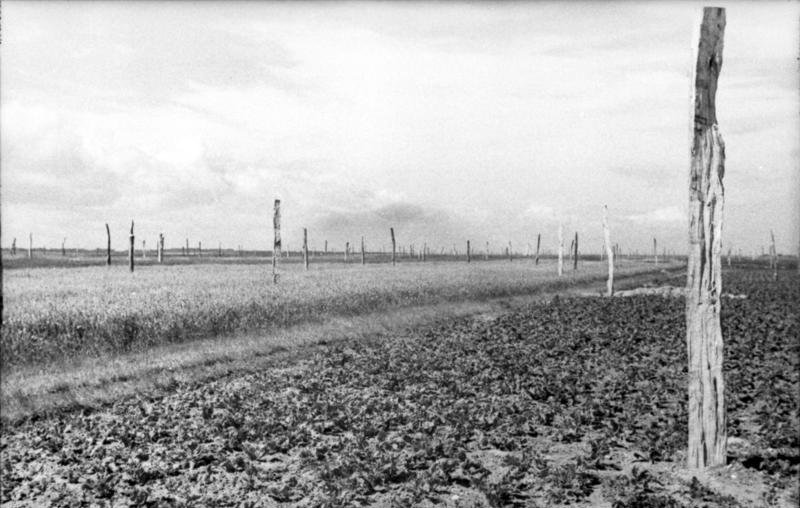
Above and below; “Rommel’s Asparagus”, wooden poles hammered into the ground, sometimes with connecting wires to prevent gliders from landing. Areas where gliders and parachutists might land were also deliberately flooded.

The men had trained hard for what was going to take place and had a three day dummy run whereby they had to successfully capture two bridges and hold on to them until reinforcements arrived. They also had good intelligence with air reconnaissance photos and local French Resistance members keeping them updated on German improvements to their security defences. One such courageous member was Madame Vion, who officially ran the local maternity hospital but secretly collected information and then passed it on to members in Caen who relayed it to the British. Supplying her with useful information were the owners of the Cafe Gondree, Georges and Therese Gondree. Therese came from Alsace in eastern France and spoke German as well as French and so was able to understand the supposed secret conversations of the officers and men who used their cafe.

Above and Below; Cafe Gondree, still exists to day and is still owned by Georges and Therese’s daughter, Arlette, who was only 4 years old when the cafe was liberated.

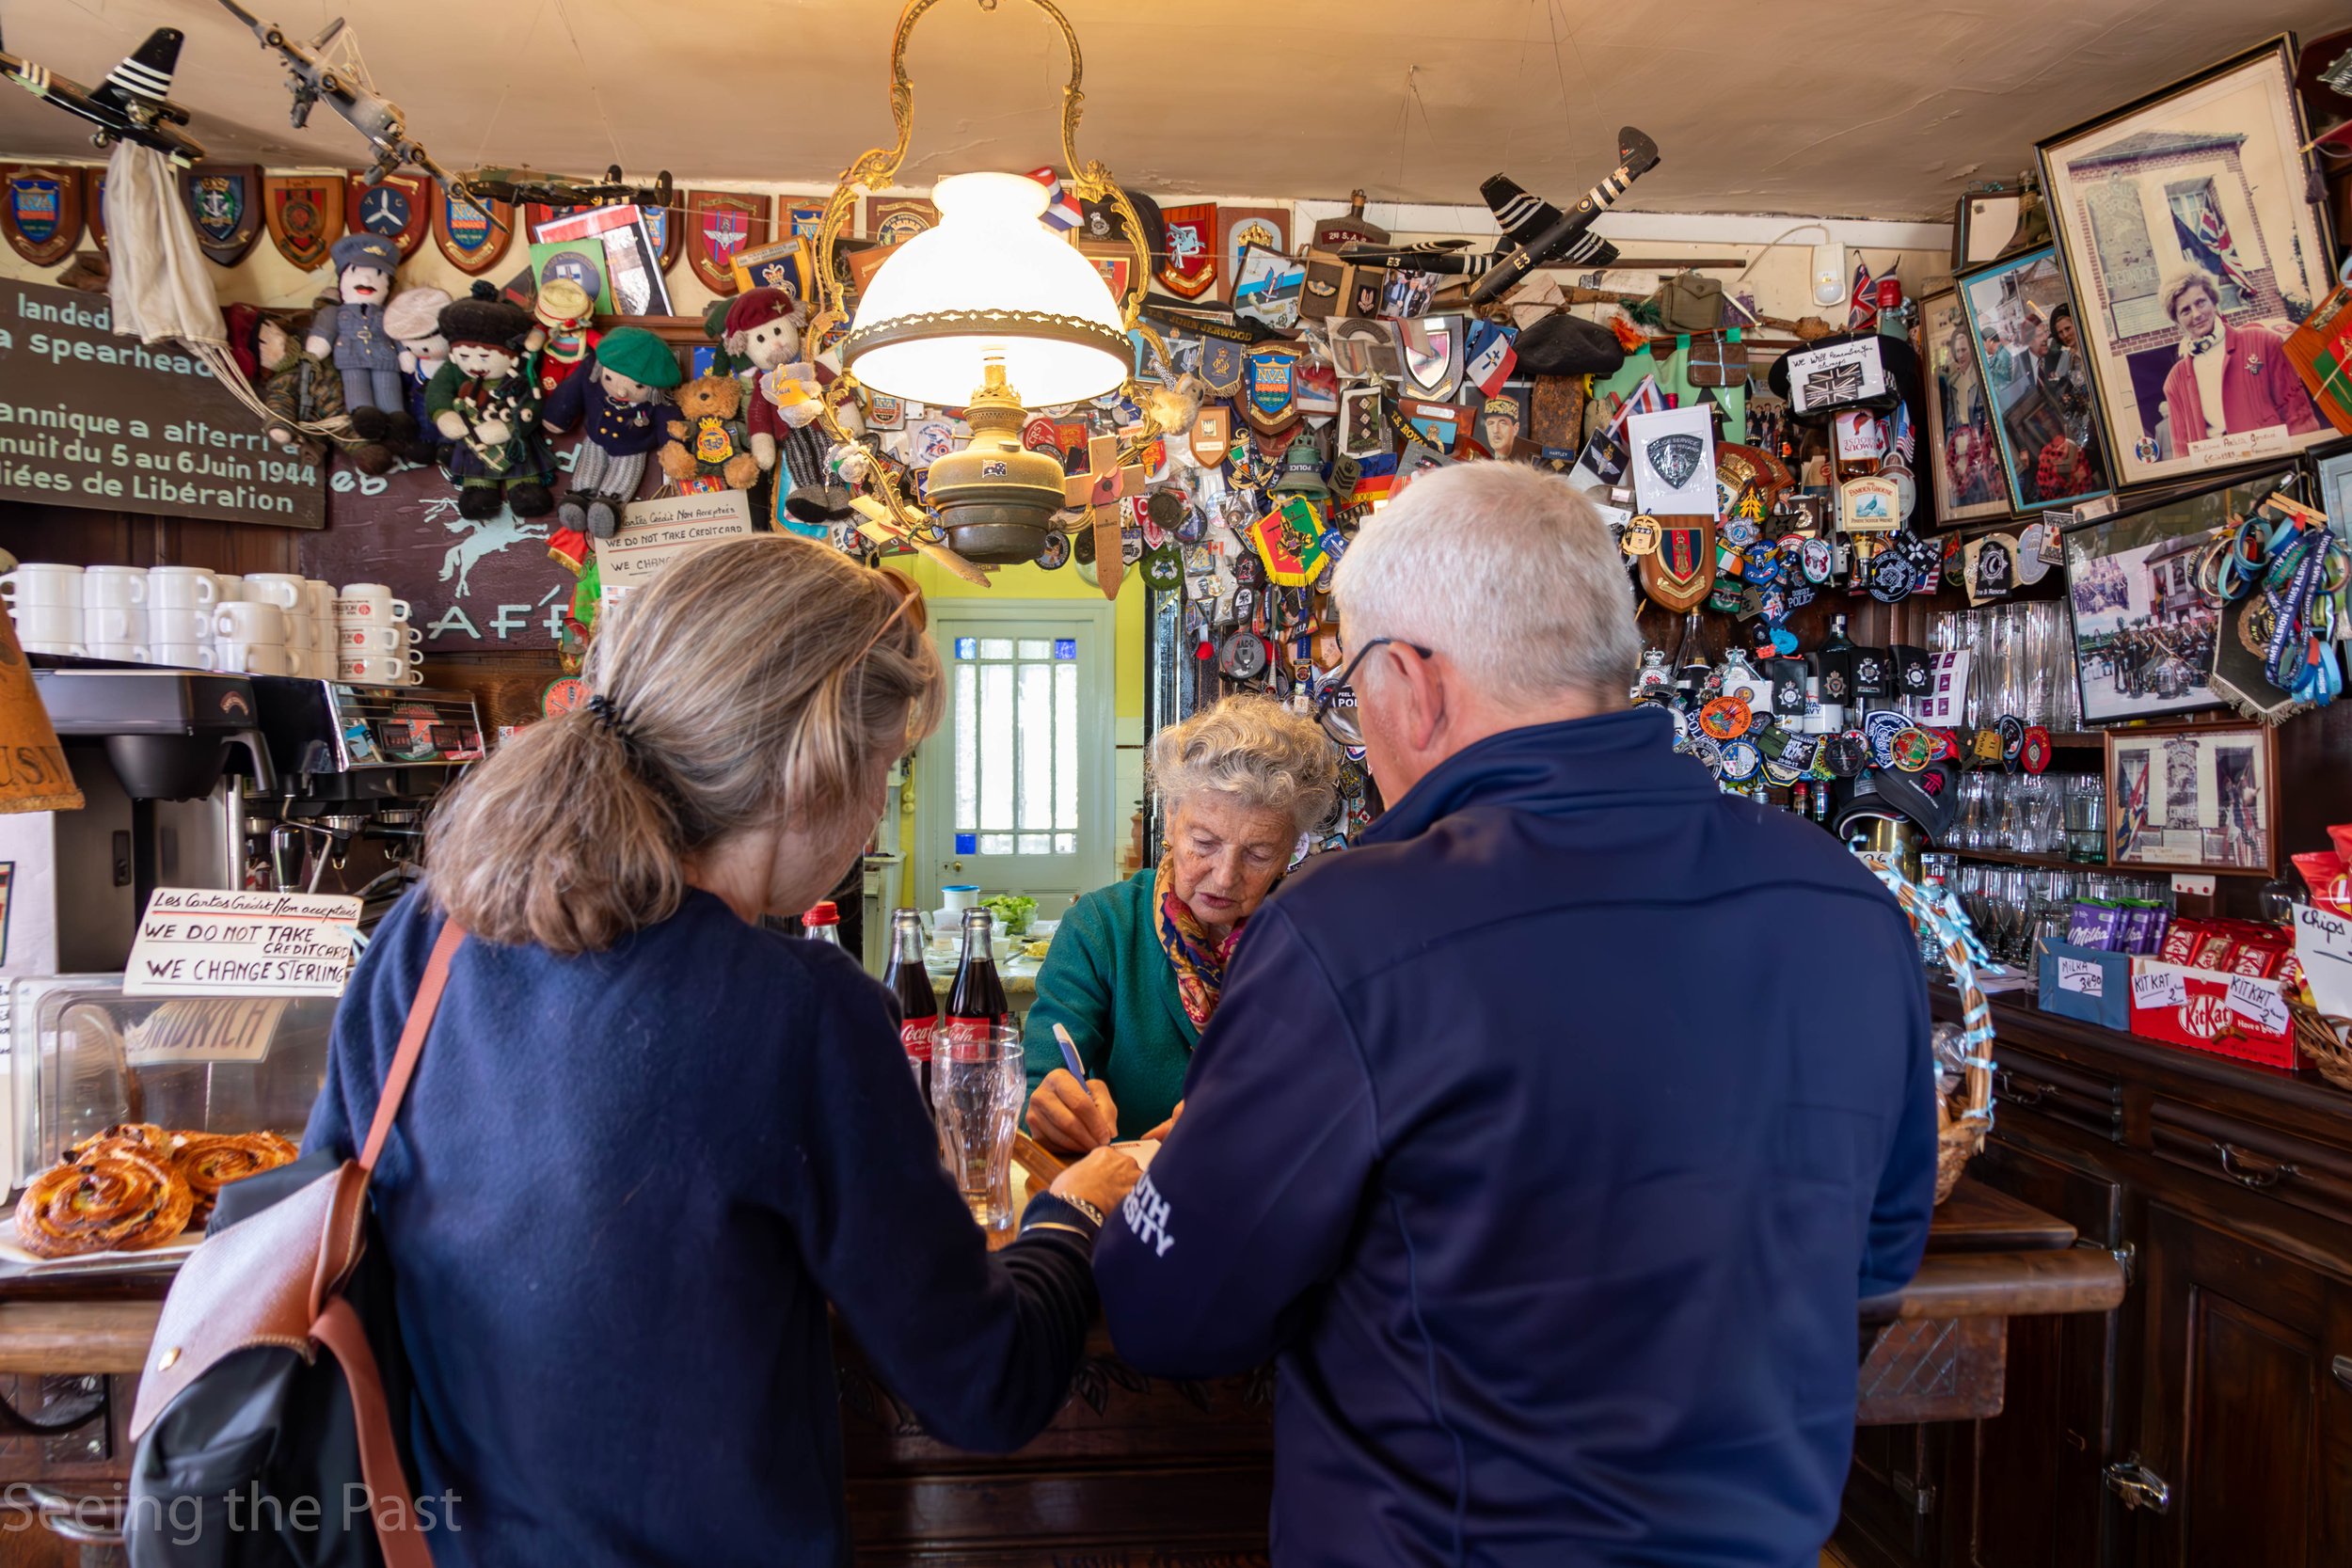
Above; Arlette Gondree taking our order, some rather nice baguettes.
Piloting a glider, ie an aircraft without an engine and land it at a specific location in the dark, seems to us lay people, as a pretty impossible thing to do. However, the first glider to land, piloted by Staff Sergeant Jim Wallwork was only 47 yards from the target. Piloting the glider was very complex and not simply gliding down to the land below. Having been released from the Halifax, Jim Wallwork had to successfully perform a series of turns which were timed using a stopwatch held by his co pilot, Staff Sergeant John Ainsworth, whilst descending.
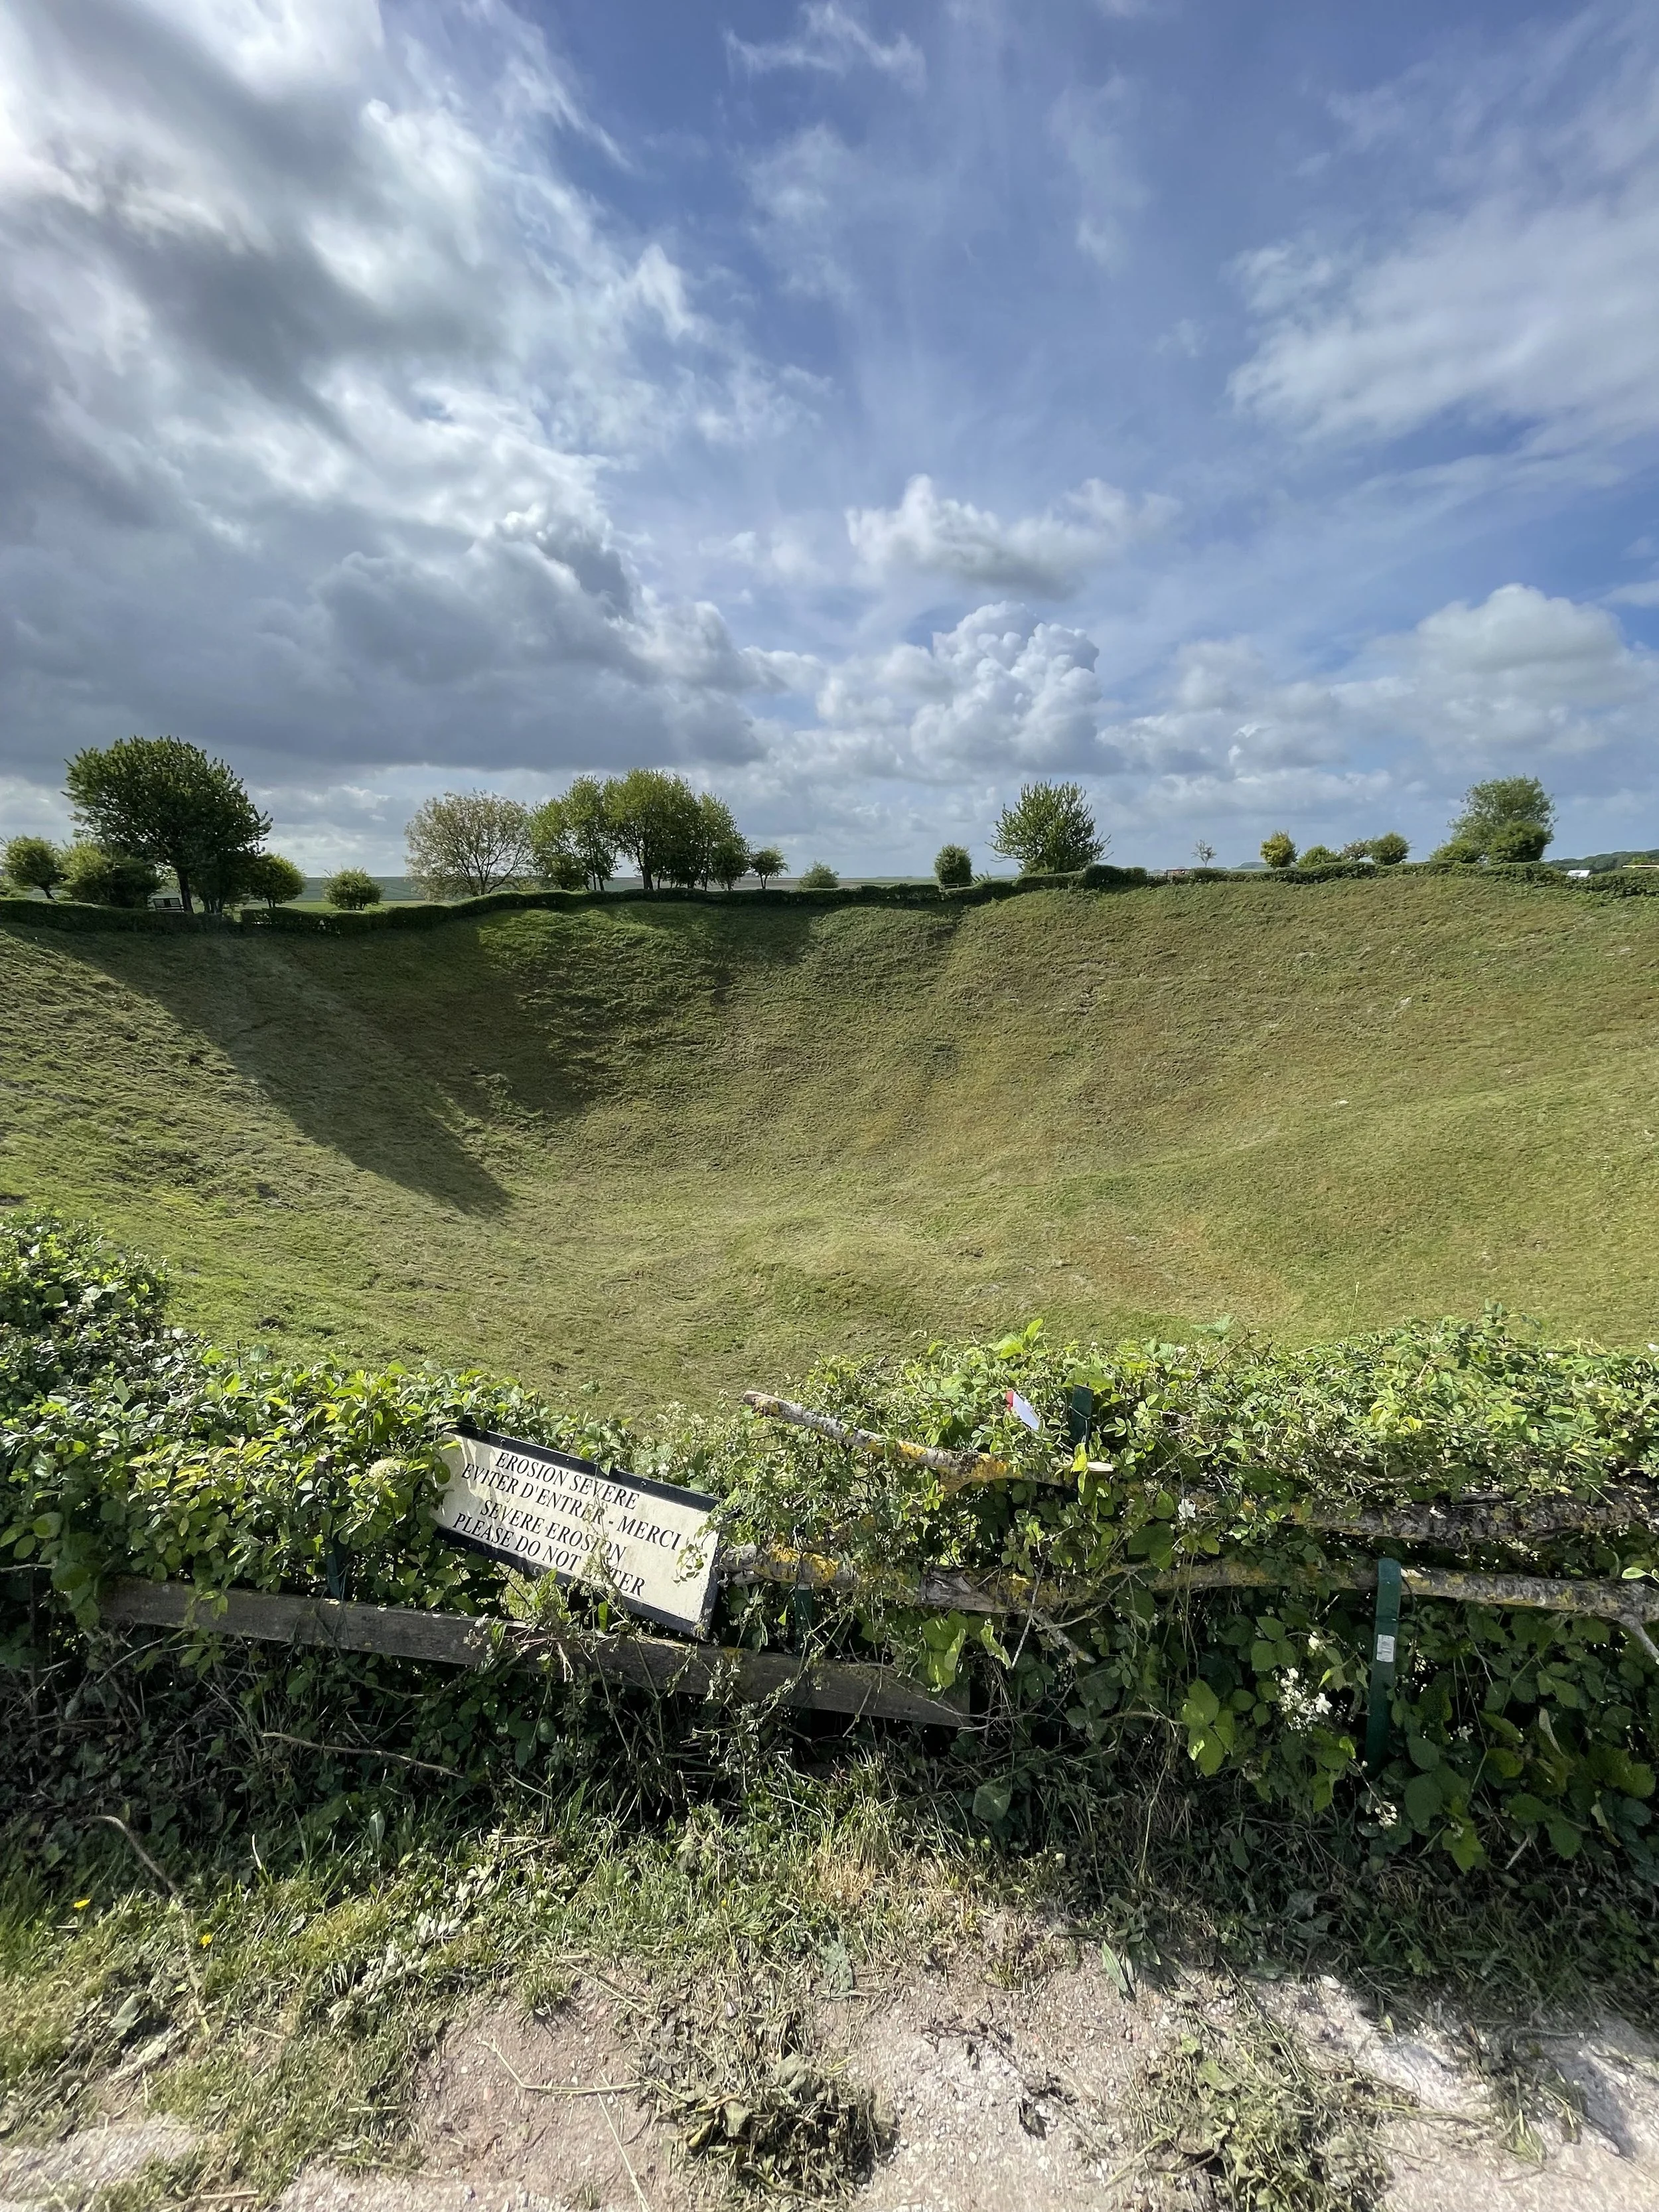
Below; the stone where my niece is standing shows where the first glider landed. The stone in the distance is where the second glider landed.


Above and below; crashed Horse gliders.

Crossing the bridge.
Below is the actual Pegasus Bridge which you can see and walk on at the museum.

Below is the modern bridge in place today but although this is where the fighting took place, you have to pay to visit the museum to see the actual bridge, pictured above. There is so much to see in the museum that it is well worth the low entry fee.


Above and below; as you cross the bridge, search out the bullet holes and marks.

Lieutenant Den Brotheridge led the men across the bridge dealing with any of the enemy soldiers that he encountered. He managed to get right across the bridge but whilst he was in the act of dropping a grenade into a machine gun post, a bullet went straight through his neck! Sadly, he died several hours later and is nowadays considered to be the first British soldier to die as a consequence of enemy action on D Day. It was requested that he get the Military Cross but it was turned down because he was carrying out the action that he was proposed (planned) to do.
A German tank turned up!
By 1.15 am, Major Howard’s men were now in total control of the bridge but only 15 minutes later, his men could hear the rumbling noise of a tank approaching. It was about 300 metres away in the direction of Benouville and was getting closer by the minute. Howard had a big problem, he had few soldiers and no-one could lay their hands on his No 82 “Gammonn Grenades” which were meant to be used against tanks on such an occasion! The only other weapon of use was a “Piat” but unfortunately, all bar one had been damaged in the gliders’ crash landings!

Above; the top two guns are Sten guns whereas the bottom one is an example of a Piat used against the advancing German tank. Below is the Piat shell.

A Piat stands between success and failure.
Howard’s next problem was the poor reputation of a Piat. Below; his problems is explained in a caption nearby.
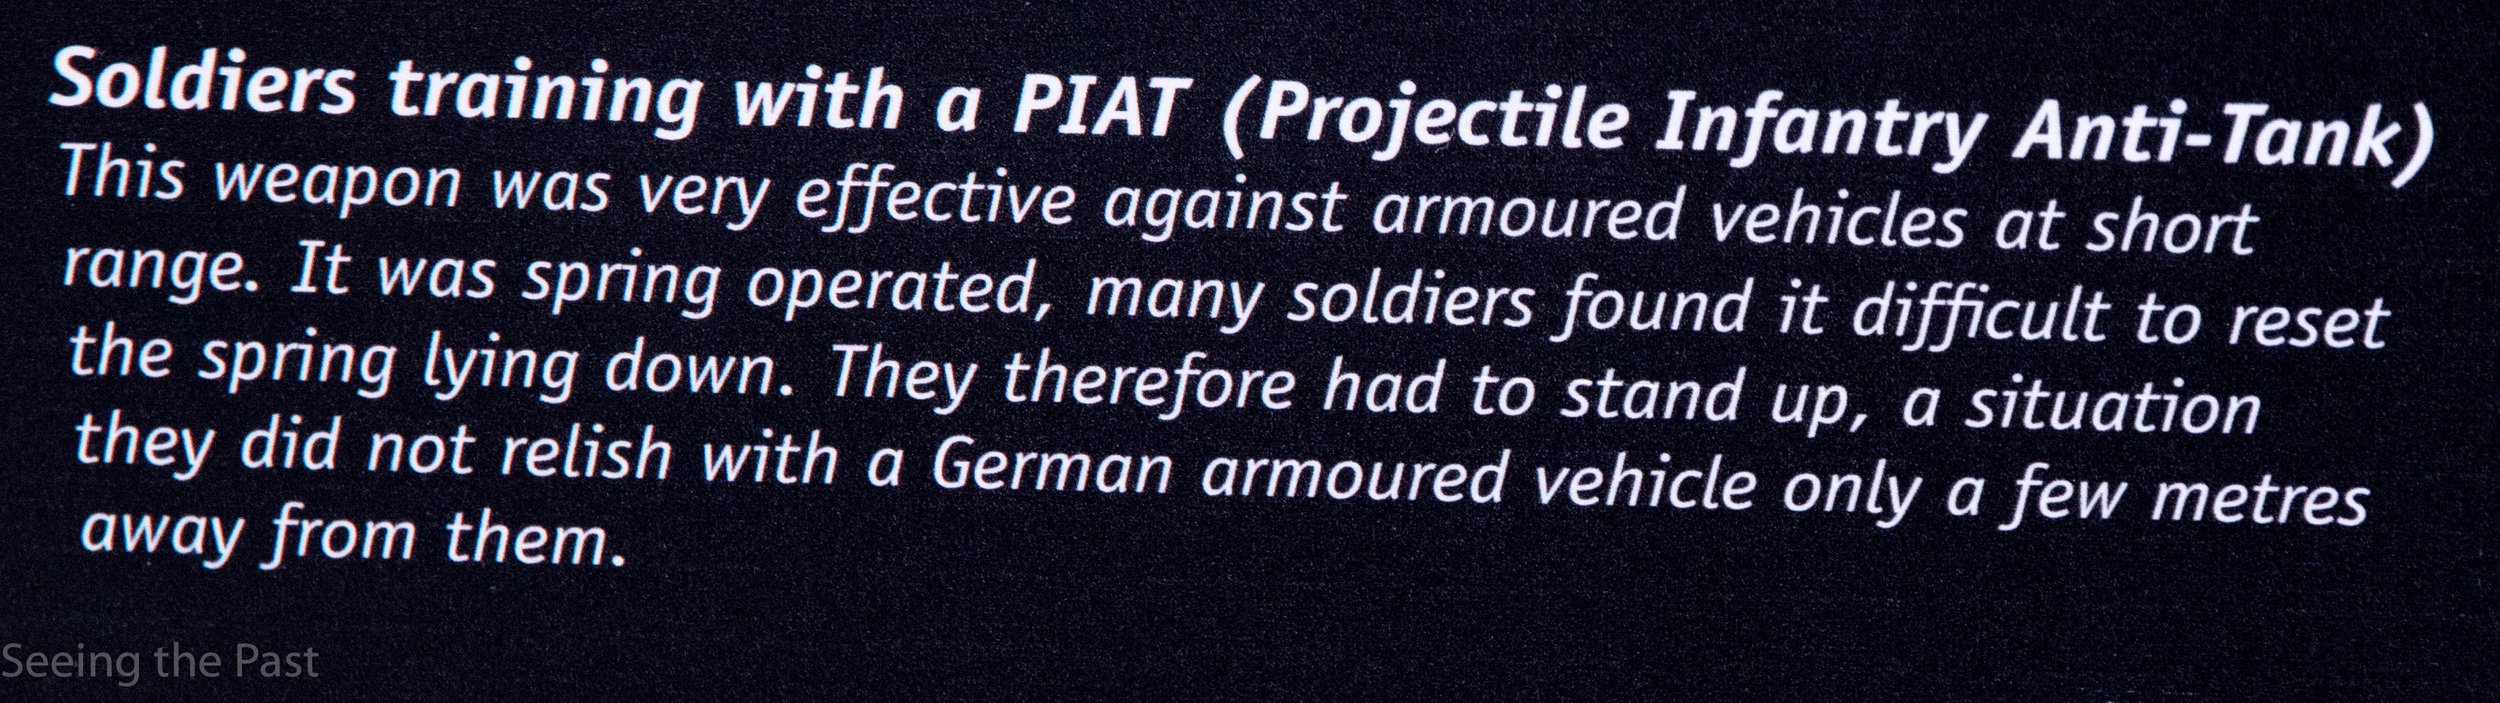
Nearest to where the tank was approaching was Sergeant Wagger Thornton and so he was given the task of firing the Piat. Even though he had two shells, he knew that he would be taken out before he could load the second one and so it was an all or nothing situation. Later on he admitted that he was “shaking like a leaf” but the brave soldier scored a direct hit with his first shot! His aim was so good that the tank’s machine gun bullets inside the tank set off its grenades which in turn set off its shells. The huge explosion not only put that tank out of action, it now blocked the road and the accompanying German tank decided to escape from the scene as quickly as possible. The Germans now concluded that the British were holding the bridges from a position of strength and decided to retreat and wait for dawn until attempting another attack. This gave the British enough time to wait for reinforcements to arrive.
The plan had been a success. The bridges were captured and held with the Germans being kept at a distance. The D Day invasion could take place with a secure western flank.

Above; even the shape of the roof of the museum has been thoughtfully created.
What is there to see inside the museum?

Above; a diorama illustrating objects associated with fighting in this area.

Above; so many things were invented to ensure success against the Germans and here is a fine example, the Welbike. It is a miniaturised motorbike that is designed to be folded away and placed in a container linked to a parachute. It had a speed of 48km per hour and a range of 145 kms.It got its name from Welwyn, where it was designed.

Above; in the centre of the museum is this large map that is part of a presentation on D Day. It is easy to walk around the map and get a good idea of the key places in relation to each other.

Above; a model of the bridge with the paratroopers attempting to capture it.

Above; full size dummies of kitted out Ox and Buck’s paratroopers
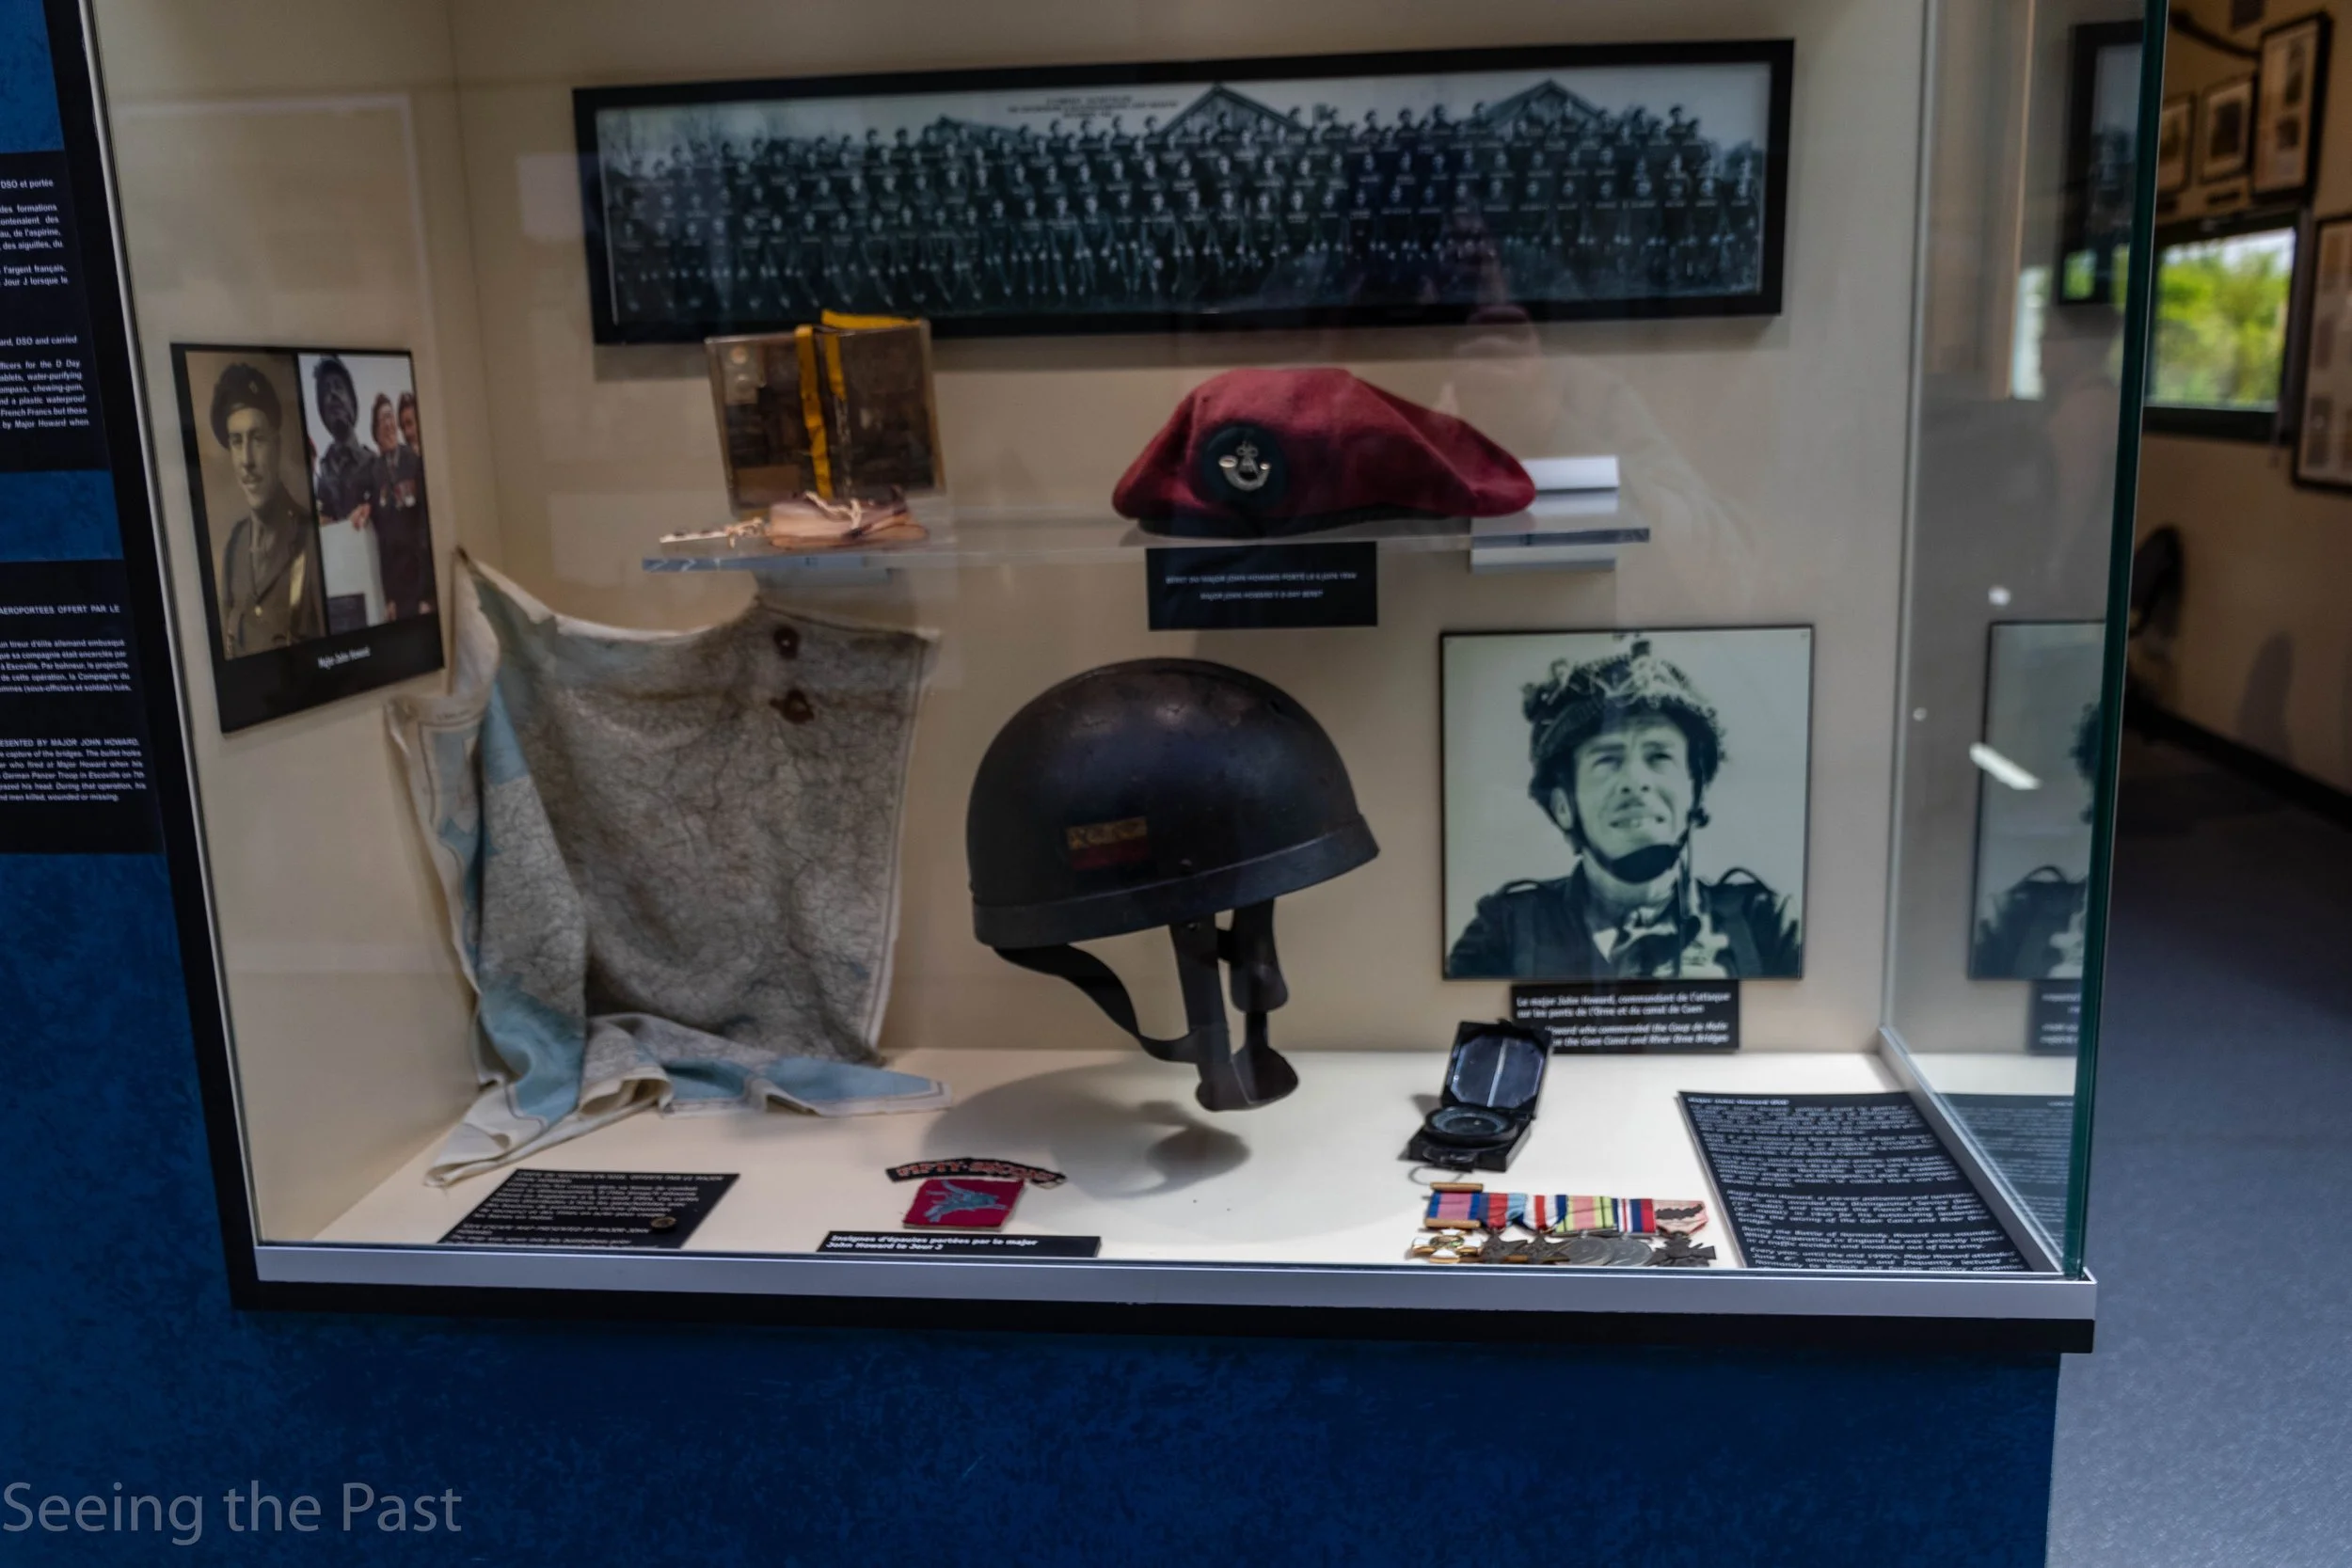
Above; a case devoted to the leader of the raid, Major John Howard and below, a close up of his medals.

Below; Some information about Major Howard and his medals.


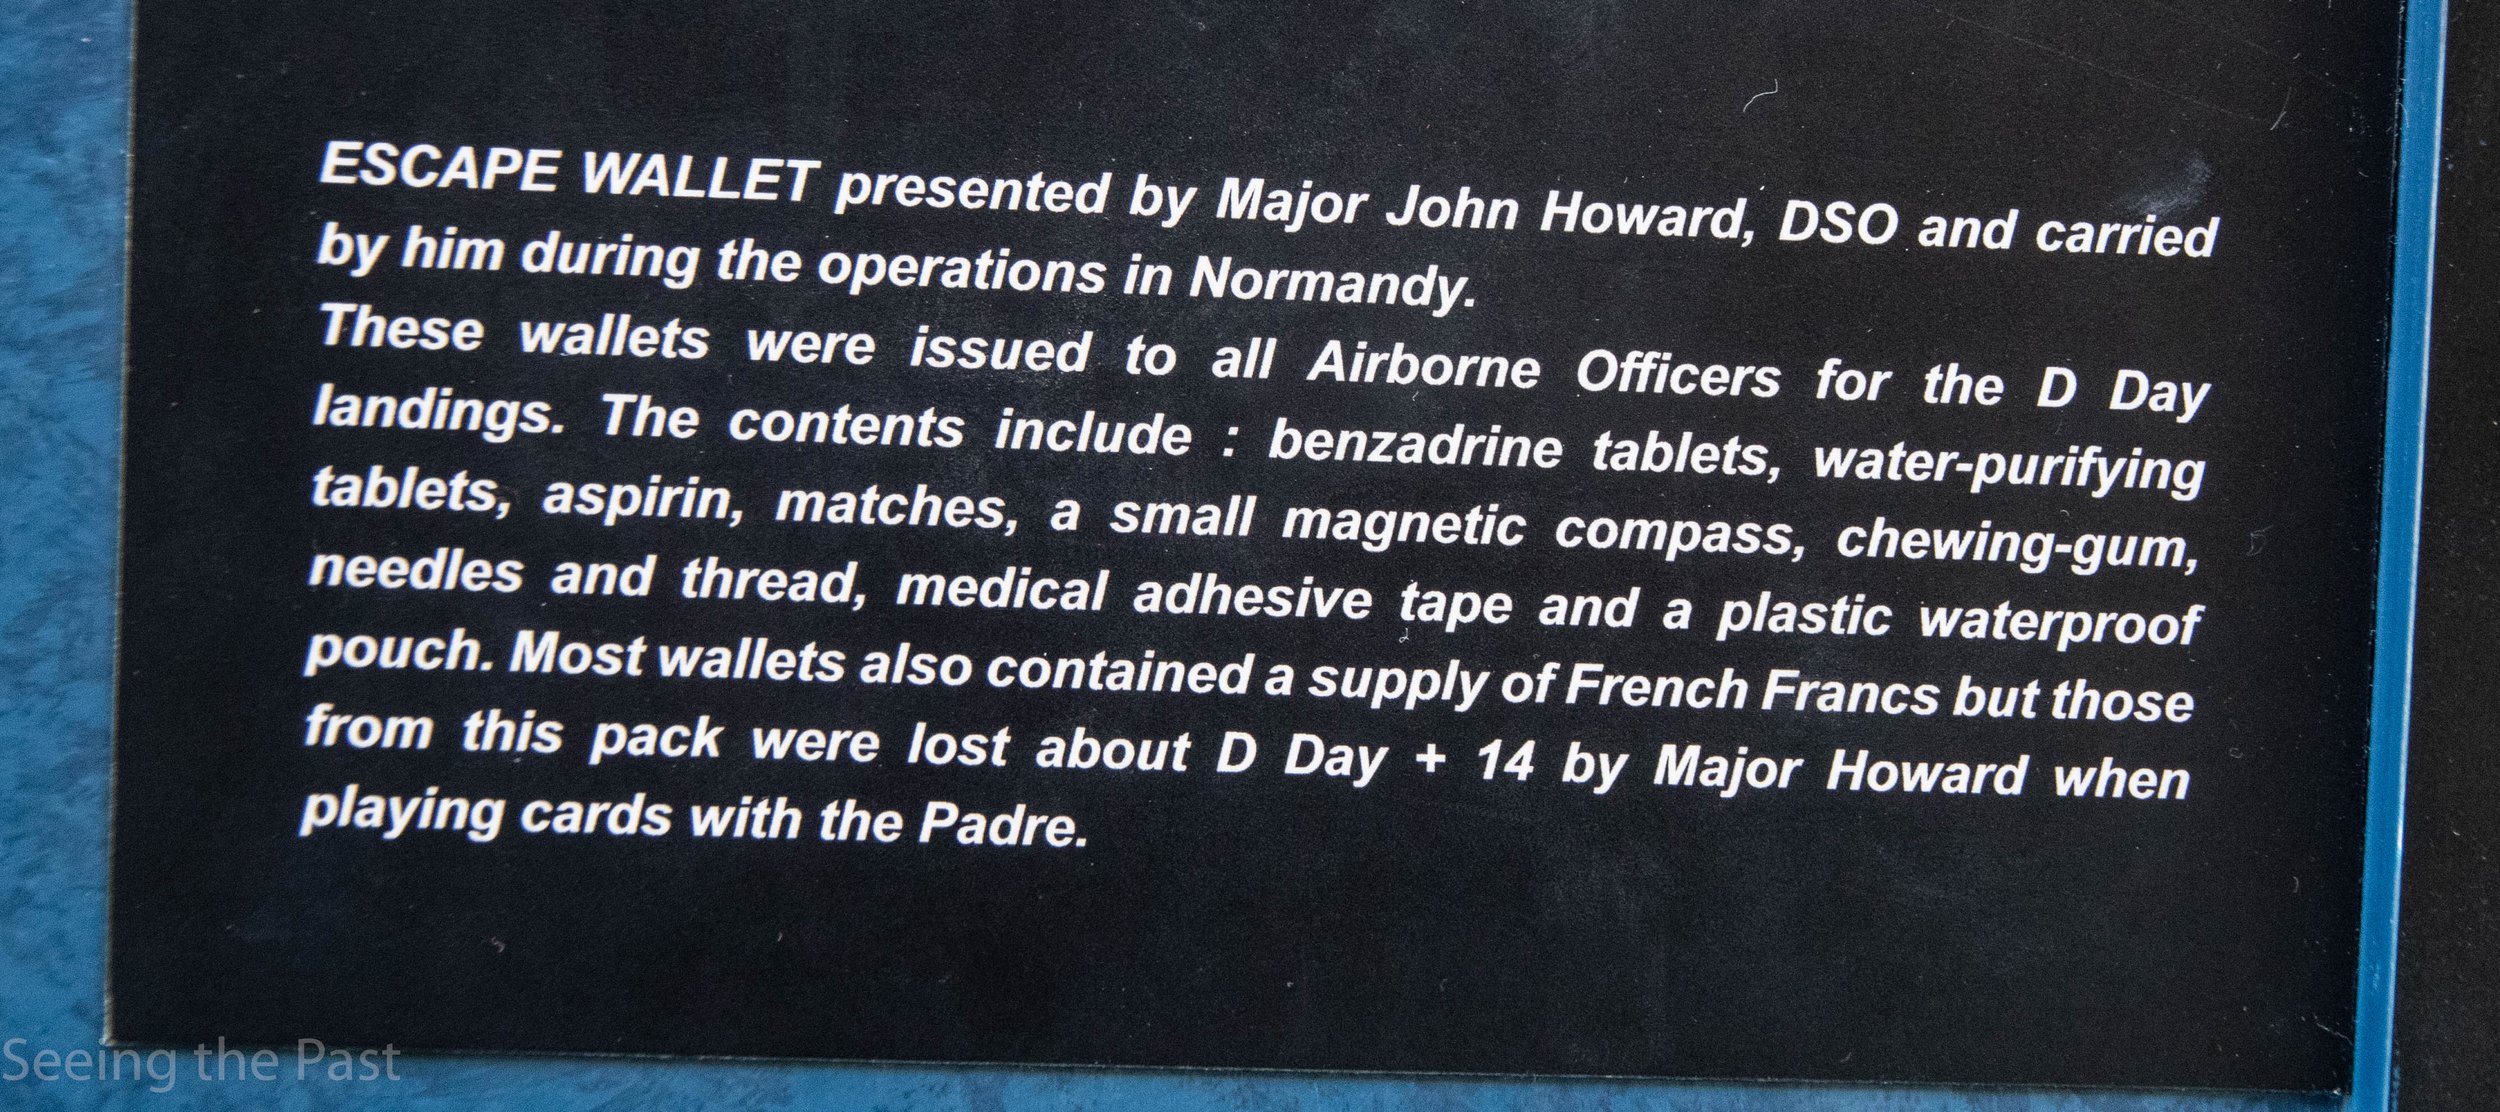
Above; Major Howard’s wallet containing vital things for an airborne soldier. Below; an explanation of what was in the wallet.

Above; another thing of interest is the story of a pigeon called the “Duke of Normandy”. He was put in a cardboard container, like the one in the photo, on June 1st 1944 and was parachuted in, with British paratroops, on June 6th who were tasked with capturing the Merville Battery. Taking out these heavy guns was another vital task on the eastern flank of the main landings to prevent huge artillery guns attacking the beaches and landing craft as the men got to shore. To secretly inform headquarters in London, that the Merville Battery had been silenced, a message in a small canister was attached to Duke’s leg just before he was released to fly back home. Despite a war going on above and below him, bad weather and being incarcerated for six days in a cardboard box, Duke successfully achieved his mission in 26 hours and fifty minutes. He was awarded the Dicken medal for his bravery, the animal equivalent of the VC.

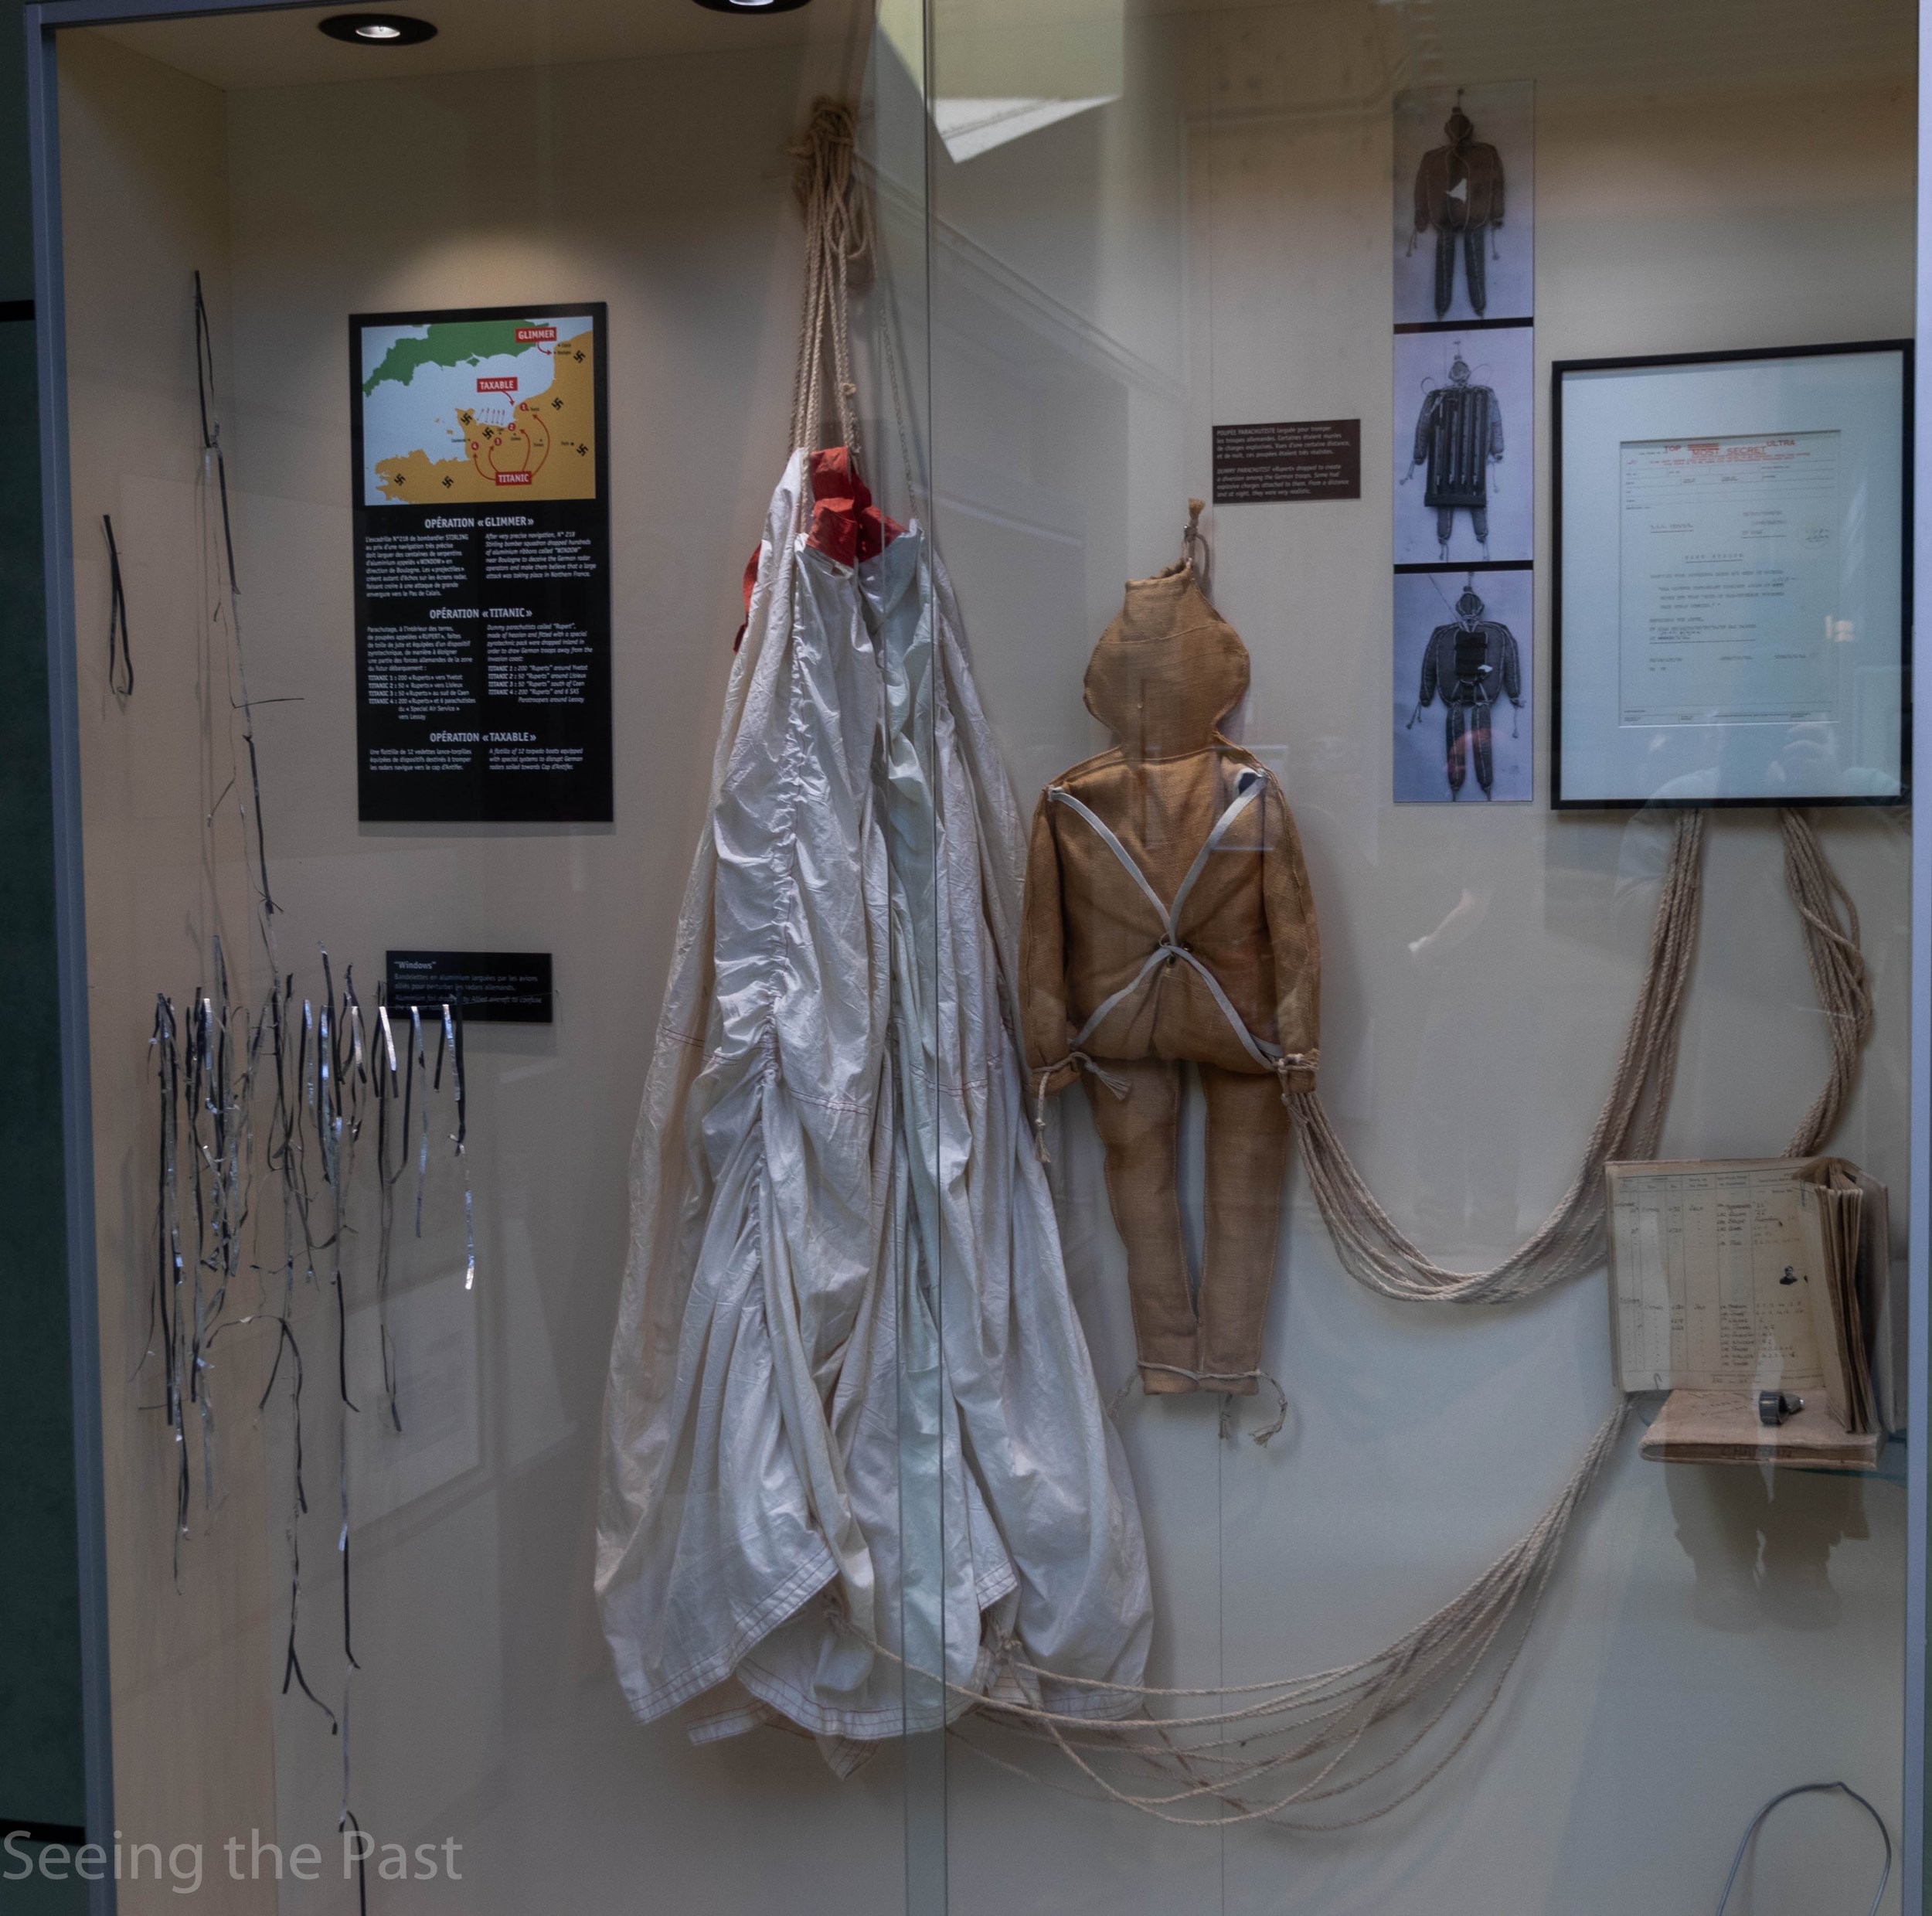
Above; a map showing diversionary tactics to confuse the Germans.
Below; “Operation Glimmer” was where Stirling bombers dropped loads of metal foil (on the left of the photo below) called “Window” near Boulogne to deceive German radar operators into believing that the Allies were attacking the region of France that the Germans always expected.
In the middle of the photo is an example of a “Rupert” from Operation Titanic. This was a small dummy parachutist made from hessian (sack cloth), stuffed with straw and sand with a pyrotechnic pack that simulated an airborne attack. They carried explosives that were timed to explode as they reached to ground to simulate a paratrooper burning his parachute. Despite only being 3 feet (90 cm) high, they did look like the real thing from a distance.They were dropped inland to draw German troops away from the coast and were quite effective. Titanic 1 saw 200 Ruperts dropped at Yvetot, 2 saw 50 Ruperts at Lisieux, 3 saw 50 to the south of Caen and 4 saw 200 Ruperts and 6 SAS paratroopers dropped at Lessay. In the last case, the SAS played recoded sounds of battle, gunfire, yelling etc to confuse the enemy even more. Operation Titanic was successful with several intercepted German signals reporting the Rupert parachutists and several German units being diverted to their drop zones. Proof of this was the movement southwards of the German 915th Grenadier Regiment away from the Omaha and Gold Beaches as well as the US 101st Air Division drop Zones.
Essential Information
Getting there.
Address; Avenue du Major Howard 14860 Ranville. There is a small car park.
Opening Times and ticket prices;
Articles that might interest you.

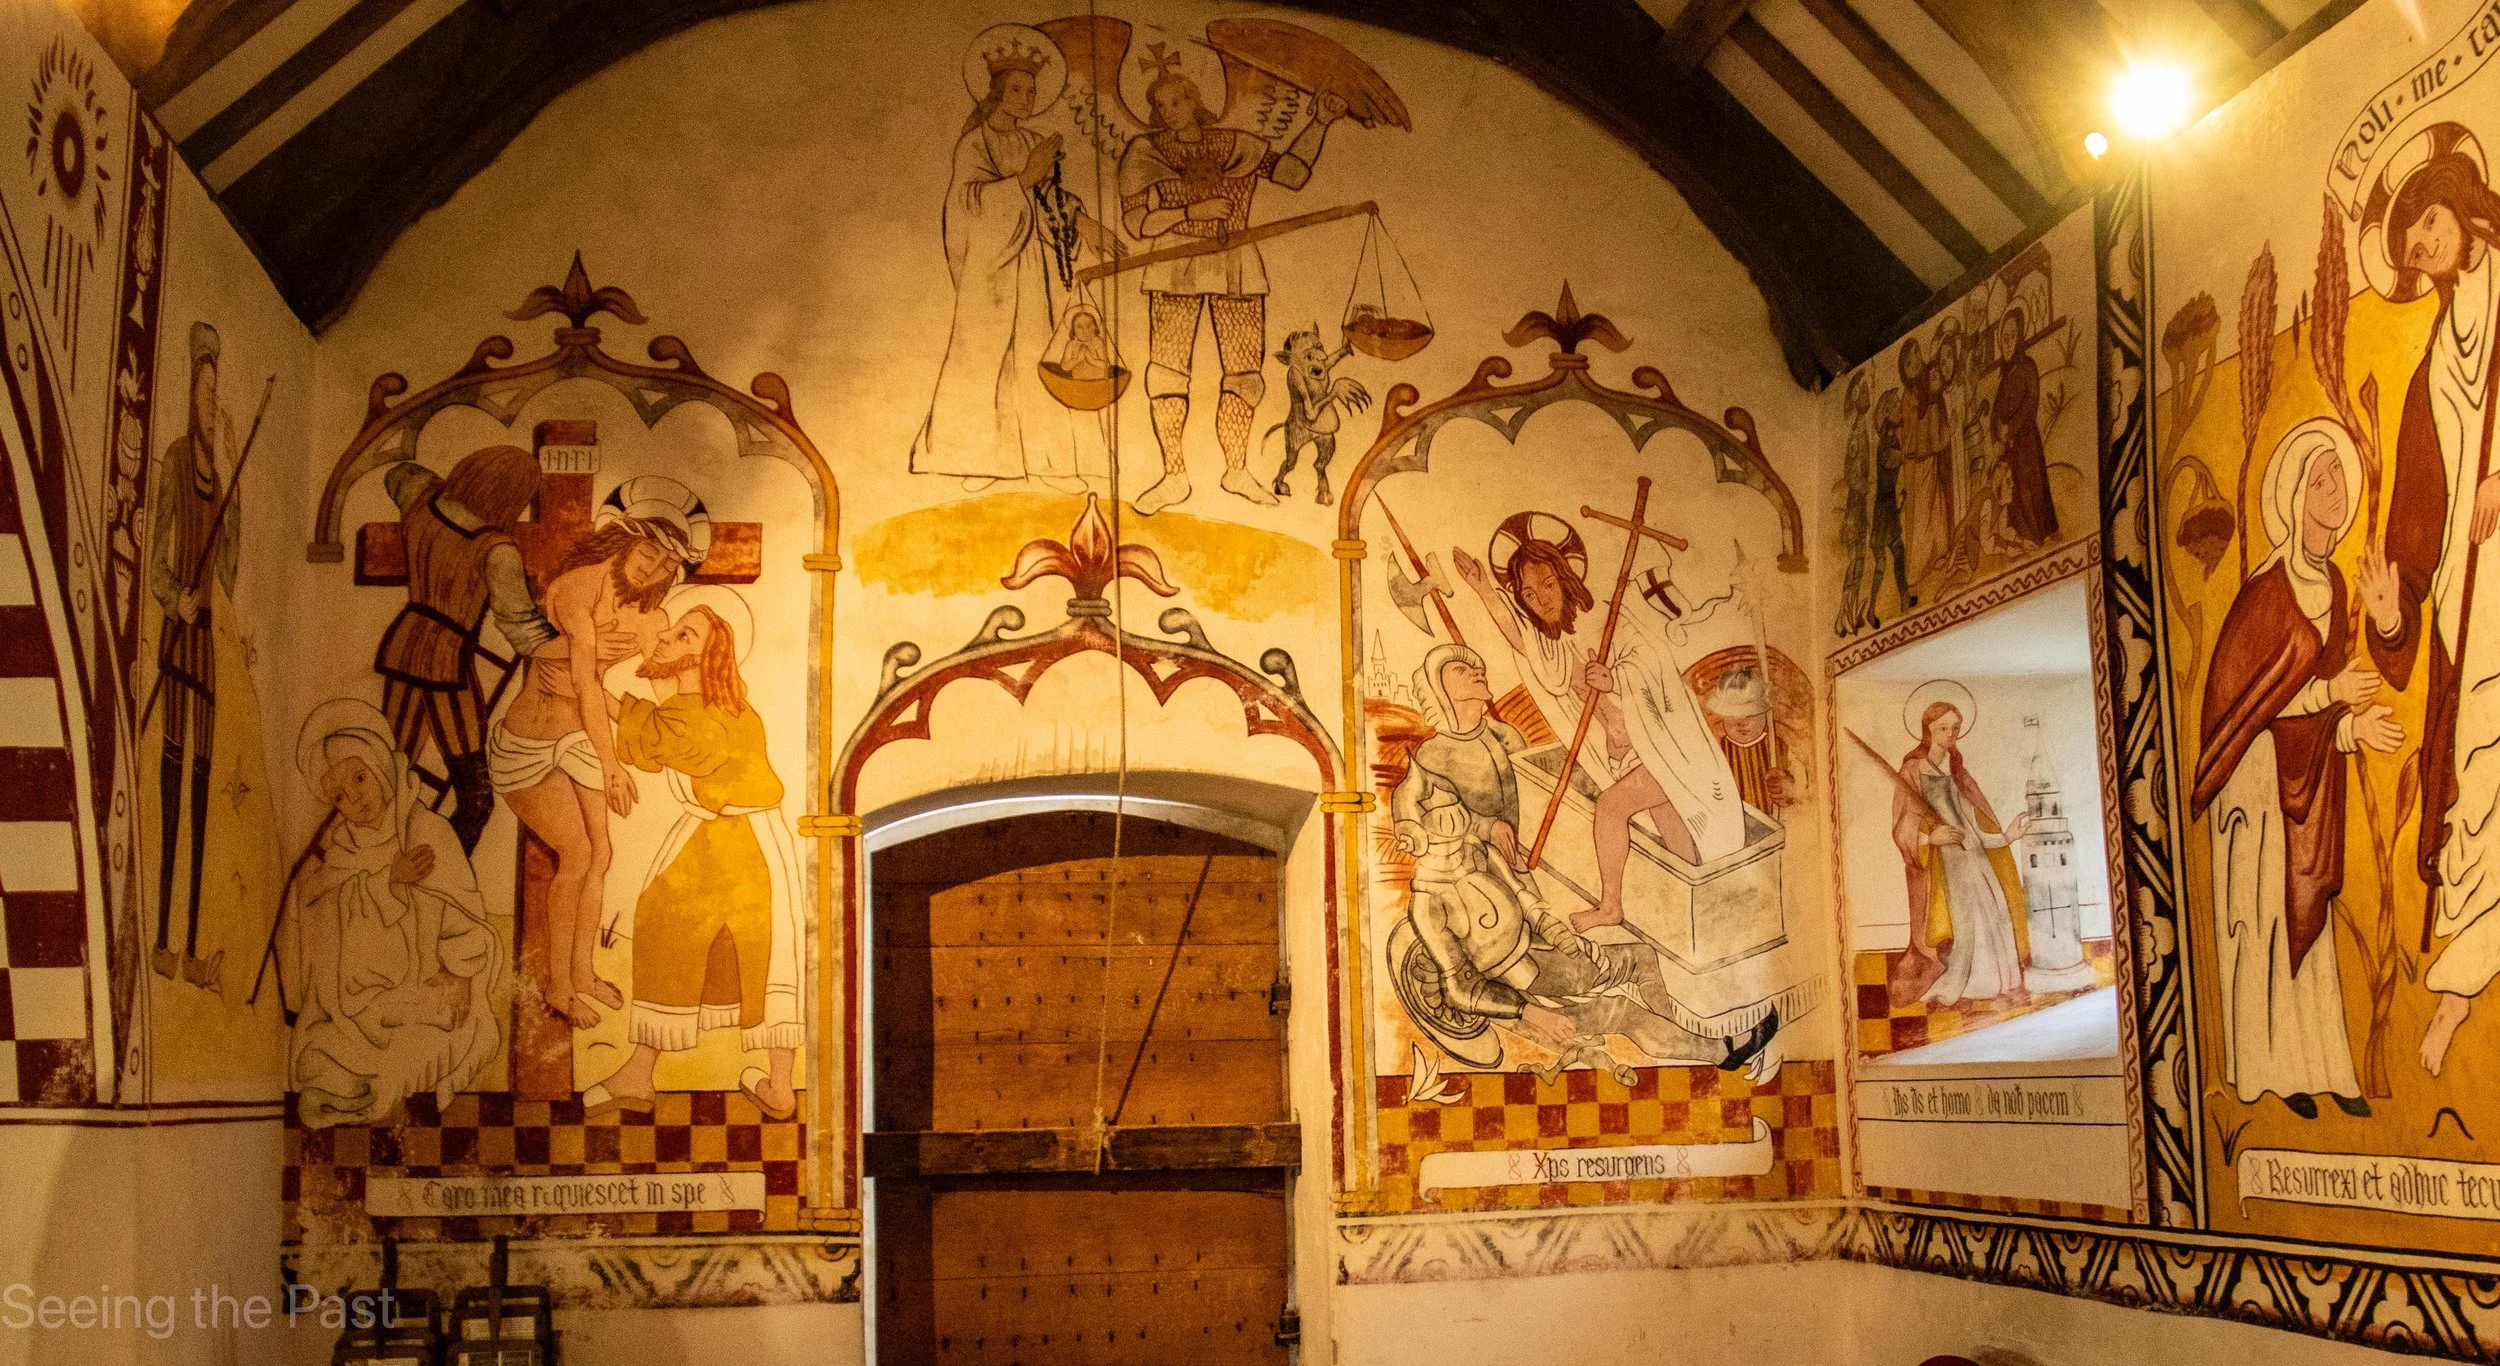


St Teilo’s Church, now lovingly re-erected within the open-air precinct of St Fagan’s Museum of Welsh Life, is a remarkable testament to Wales’s medieval and 16th century heritage. Originally constructed in the early 16th century, this humble parish church was painstakingly dismantled, transported, and restored to its former glory — not least its dazzling wall paintings, which have been carefully recreated with scholarly precision. These vivid murals, brought back to life through meticulous craftsmanship, offer visitors a rare window into the devotional art and storytelling of the late medieval period. Stepping inside St Teilo’s, you’re transported back half a millennium, immersed in a world where faith, community, and artistic expression converged on plastered walls that still speak with vibrant colour and enduring power.