
D Day series;"What courageous actions, sacrifices and setbacks unfolded on Gold Beach during the D-Day landings?
/
German defences at gold beach. (Copyright IWM)
Gold Beach was one of five beaches in Normandy for the planned landings. Below; Utah and Omaha beaches to the west were where American troops landed, Gold and Sword were assigned to British troops and Juno beach was where Canadian troops were to attack.

The five beaches to be attacked on D Day. (Copyright wiki commons)
Any planned attack on Gold Beach was to be faced initially by a whole variety of obstacles and mines that would rupture any landing craft. British troops could be landed at low tide to expose the obstacles but that would mean exposing the landed men to running ashore without any protection against machine gun fire.

Above;is a diorama from the Overlord museum near Colleville and features American soldiers but in this photo you can see the iron obstacles known as Czech Hedgehogs, arrowed blue (please note the thicker blue arrow, on the right, is a photograph). The pink arrow points to a pole in the ground with a landmine strapped to the top, a simple but dangerous weapon.
At 5.30 am, 5 cruisers and 13 destroyers opened fire on the German artillery batteries, such as at Longues Sur Mer pictured below and various strongpoints known as “Widerstandnestern” where machine guns and mortars were based in readiness. These had also been bombed during the night hours but very little damage was done. Fortunately, the cruiser, HMS Ajax, took out the guns at Longues Sur Mer after firing numerous112 lb shells. Apparently, one shell actually flew right into one of the casements before blowing up!

Above; a casement at Longue Sur Mer without a gun suggesting this was the one that took the direct hit. All the other casements still have their guns.
Below; a piece of the barrel that has been blown from the casement. It would have taken a large explosion to send this heavy piece of metal to be driven into the ground a few metres from where it was originally positioned.

Below; the tip of the barrel flew even further. Proof of the success of HMS Ajax.

At about this time, troops began boarding the landing craft in readiness for their assault on Gold. There were 8 large ships that carried the troops across the Channel and each one carried 18 assault landing craft. It is believed that at this point there wasn’t any firing from the shore and so the invasion was going to be a complete surprise. The plan was that, just before they arrived at the beaches, Sherman Duplex Drive tanks, ie floating tanks with 2 propellors at the back, were to get to Gold beach first and destroy any remaining strong points.

Copyright IWM
Above; a Sherman tank with its flotation collar down.
Below; a Sherman tank with its flotation collar up, as it would appear moving towards the beach.

Copyright IWM

Above and below; a landing craft that would have carried tanks across the English Channel, now on show in the D Day Story, Portsmouth.

Unfortunately, many plans were to go awry and in this case, choppy seas meant that the tanks had to be delivered closer to the shore or in some cases directly onto the beach. Added to this, was a delay in the “Hobart’s funnies tanks” that were specially designed to deal with specific obstacles and problems.(See photos below) This meant that they arrived at 7.30 am, the same time as the soldiers and the scene was rather chaotic. The soldiers had arrived on Landing Craft Assaults, small wooden boats that were tasked to carry 30 men ashore. The LCAs were very slow, with a top speed of only 6 knots, (6.9 mph) and therefore, very vulnerable to enemy guns. The sea was, as predicted, very “choppy” and so most of the men were seasick. At 30 metres out, they had to jump into the sea with some of the men up to their armpits in water and being shot at by machine guns. Some craft never even made it to the shore having struck mines mounted on poles, whilst others had their bottoms slashed by the Czech Hedgehogs mentioned and shown earlier.

Copyright IWM
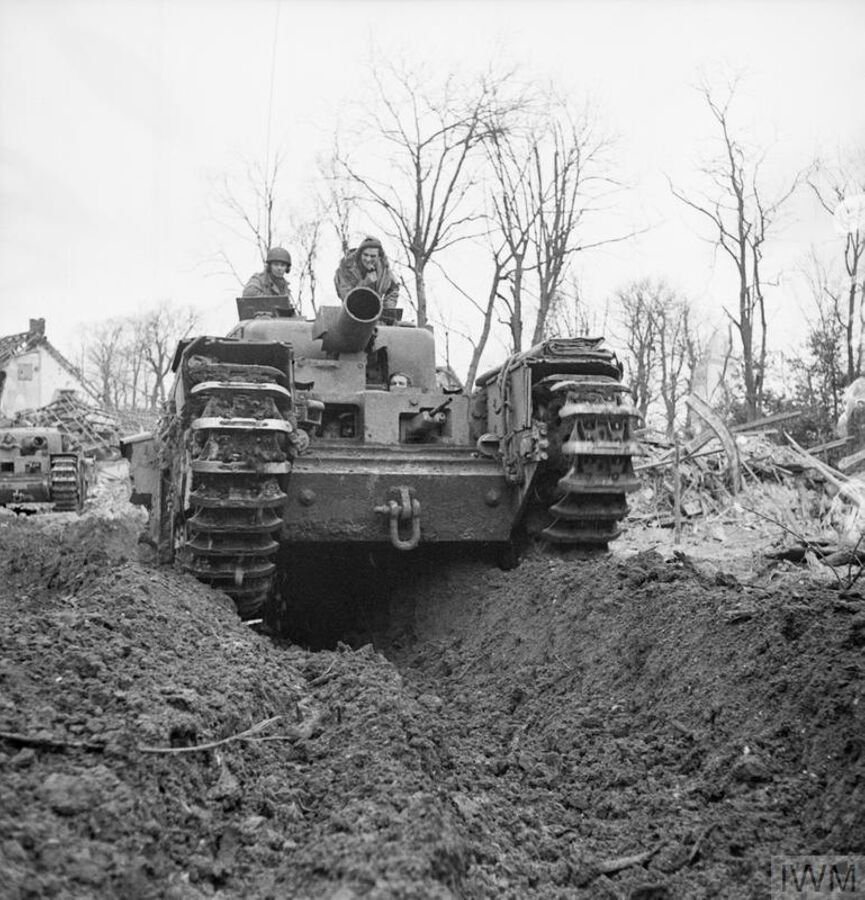
Above; this was a “Hobart Funny” called the “Crab Flail” that would thump the ground in front of it so that any landmine would explode, causing no harm. This would create a safe route through a minefield for others to use.
Copyright IWM
Above; is another “Funny” that was a Churchill tank AVRE (Armoured Vehicle Royal Engineer) that could fire a 12 inch Petard Spigot Mortar which carried a 26lb of high explosive up to 230 yards although it was more effective up to 85 yards. The mortar, also known as the “Flying Dustbin”, was used to demolish steel and concrete structures.

Above; a map showing Gold Beach. See the explanation below.
How, Item Jig and King are subdivisions of Gold beach.
L is the battery of large guns at Longue-Sur-Mer. A is Arromanches where the harbour was to be built and H is Le Hamel, a strongpoint which is going to give the British soldiers a lot of problems.
Jig was to be invaded by 231st Brigade which included the 1st Hampshire Regiment and the 1st Dorset Regiment. The 47 Royal Marine Commandos are also going to come ashore at Jig.
King was to be invaded by the 69th Brigade which included the 6th and 7th Green Howards and the 5th Yorkshire Regiment.

Copyright Wikicommons
What happened at the Jig section of Gold Beach?
Again, not everything followed the original plan with strong currents pushing the Hampshires and Dorsets east of their chosen landing points. The Hampshires landed opposite a strongpoint that was still in working order and immediately had to deal with showers of machine gun fire. Initially, they were pinned down and could not get off the beach! In front of them was a minefield and barbed wire as well as two concrete pillboxes with machine guns. Eventually, troops on the left flank managed to sneak around the pill boxes and put them out of action. Le Hamel, (see map) in particular, was very effective at killing troops as well as destroying tanks and so had to be taken out but only after several hours. Its 75 mm guns left two crab flail tanks burning at the water’s edge. It also shot off the bow of a tank carrying landing craft and thereby trapping the tanks inside. When the Sherwood Rangers came in to help the Hampshires, they too lost 4 tanks and had another three sink, as they tried to make it to the shore.
Added to all this destruction, key personnel were also taken out. The Hampshire’s commanding officer, Lieutenant Colonel Nelson Smith was shot twice and had to be evacuated. He was replaced by Major Martin who was killed, only 2 hours after he ran ashore. Furthermore, no accurate bombarding from the ships off the coast could happen because their observer had been injured and could not radio them with vital information. The next in line, Major Warren, eventually led the Hampshires to go around Le Hamel and take it out from the rear.
Before it was finally captured at 4 pm, Le Hamel was still able to kill soldiers from other brigades landing throughout the morning at Jig. By evening, the Hampshires had swung westwards and was able to take control of Arromanches.
To the left of the Hampshires, the Dorsets were also strafed with bullets from Le Hamel and they too lost supporting tanks. In trying to force a route off the beach, the leading Crab flail tank was blown up by a mine that it had failed to detonate and in trying to go around the wreckage, an AVRE tank hit another mine. The chaos continued with yet another nearby tank getting stuck in mud and an AVRE tank behind it being destroyed by a shell. However, despite these losses, the Dorsets were able to move inland and then move westwards, behind Le Hamel taking out German defences as they went. At the end of the day, they were positioned to the south of Arromanches and but once again came under fire.
How did Sergeant-Major Stanley Hollis win the only VC to be awarded on D Day in King sector and live to tell his tale?
On the right of King section, if looking from the sea, the 6th Green Howards landed, supported by the Westminster Dragoons with their special tanks. Although they were to have a successful day, it was at a cost of several lives including sergeant Hill who, jumped off the landing craft with the rest of the men only to quickly slip into a shell hole and be dragged underwater by the weight of the kit that he was carrying. As he attempted to get free from the hole, the landing craft passed over him and its propellors horifically chopped him to pieces!

Above; at the top is a piat (projectile infantry anti tank) and at the bottom is a bren gun from the Pegasus Bridge Museum Normandy.
The plan was for a certain Sergeant-Major Stan Hollis to lead a mortar team and a group carrying Bren guns, to set up a small base at the high water mark on the beach and provide covering fire and smoke to enable the other troops to catch them up. They were then to find their way through a mine field opened up by assault engineers. In the process, a nearby tank exploded sending an iron hatch through the air in their direction but luckily, it missed them. Having got through the minefield, Stan and his men got pinned down by machine gun fire, principally coming from a pill box. Stan’s answer was to charge forward with a sten gun firing as he ran. Once near the pill box, he threw a grenade at the door, killing 2 Germans and leading to the others to come out with their hands in the air.

Above; 2 Sten guns and a Piat below from the pegasus bridge museum, normandy.
Stan followed this up by jumping into a communications trench leading to a large bunker and capturing a further 20 men. Retreat to a defensive wall and shoot from cover was the Germans next move but here again, Stan got in the action. This time, he took hold of a sniper’s Enfield rifle and killed a German clambering along the top of the wall. Unfortunately, a German returned fire and a bullet fragment “nicked” Stan’s face.

A statue honouring Stan Hollis VC in Middlesbrough.(Image from Wikimedia)
Making light of that, his next problem was a group of farmhouses near Crepon. Stan was ordered to take a Piat anti tank weapon and two men with bren machine guns, to take out the encamped Germans by crawling through a rhubarb patch. However, he missed with the Piat and crawled back to report to his commanding officer. Having got back, he realised his two colleagues were in trouble and so, not thinking of his own safety, he grabbed a bren gun and returned. This time he hid behind a wall before charging at the Germans whilst at the same time firing his gun and creating a diversion to allow his colleagues to retreat.
This was followed up by a tank with infantry on either side advancing to take on the enemy but the tank got bogged down in the mud. Stan, seeing his men as sitting ducks behind the tank again had to act. His answer was to throw a grenade at two Germans causing the problems and charging at them as they ducked with their hands over their heads expecting the grenade to explode. Oddly, Stan forgot to pull the pin out but was able to shoot both Germans.
Stan was still not finished and soon found himself and some members of his platoon crawling along a boggy ditch to successfully attack two groups of Germans hiding in two hedgerows. That was the end of Stan’s exhausting and successful day for which he was awarded the VC. In the summer, he was injured in the leg and had to be evacuated back to England.

A VC, but sadly not Stan’s.(Copyright Wikicommons)
To the right of King section, if looking from the sea, was the responsibility of the 5th East Yorkshires.They landed at La Rivera and initially had mixed success. An 88mm gun at Widerstandnesten 33 took out 2 Sherman DD tanks but a third tank got close enough to the concrete casement to nullify it. However, the infantry suffered heavy losses to machine guns and found it hard to get off the beach. Fortunately, help came from the destroyers off shore who blasted the German positions. From then on, steady progress was made in overcoming the opposition.
Google’s map of the area.
Articles that might interest you

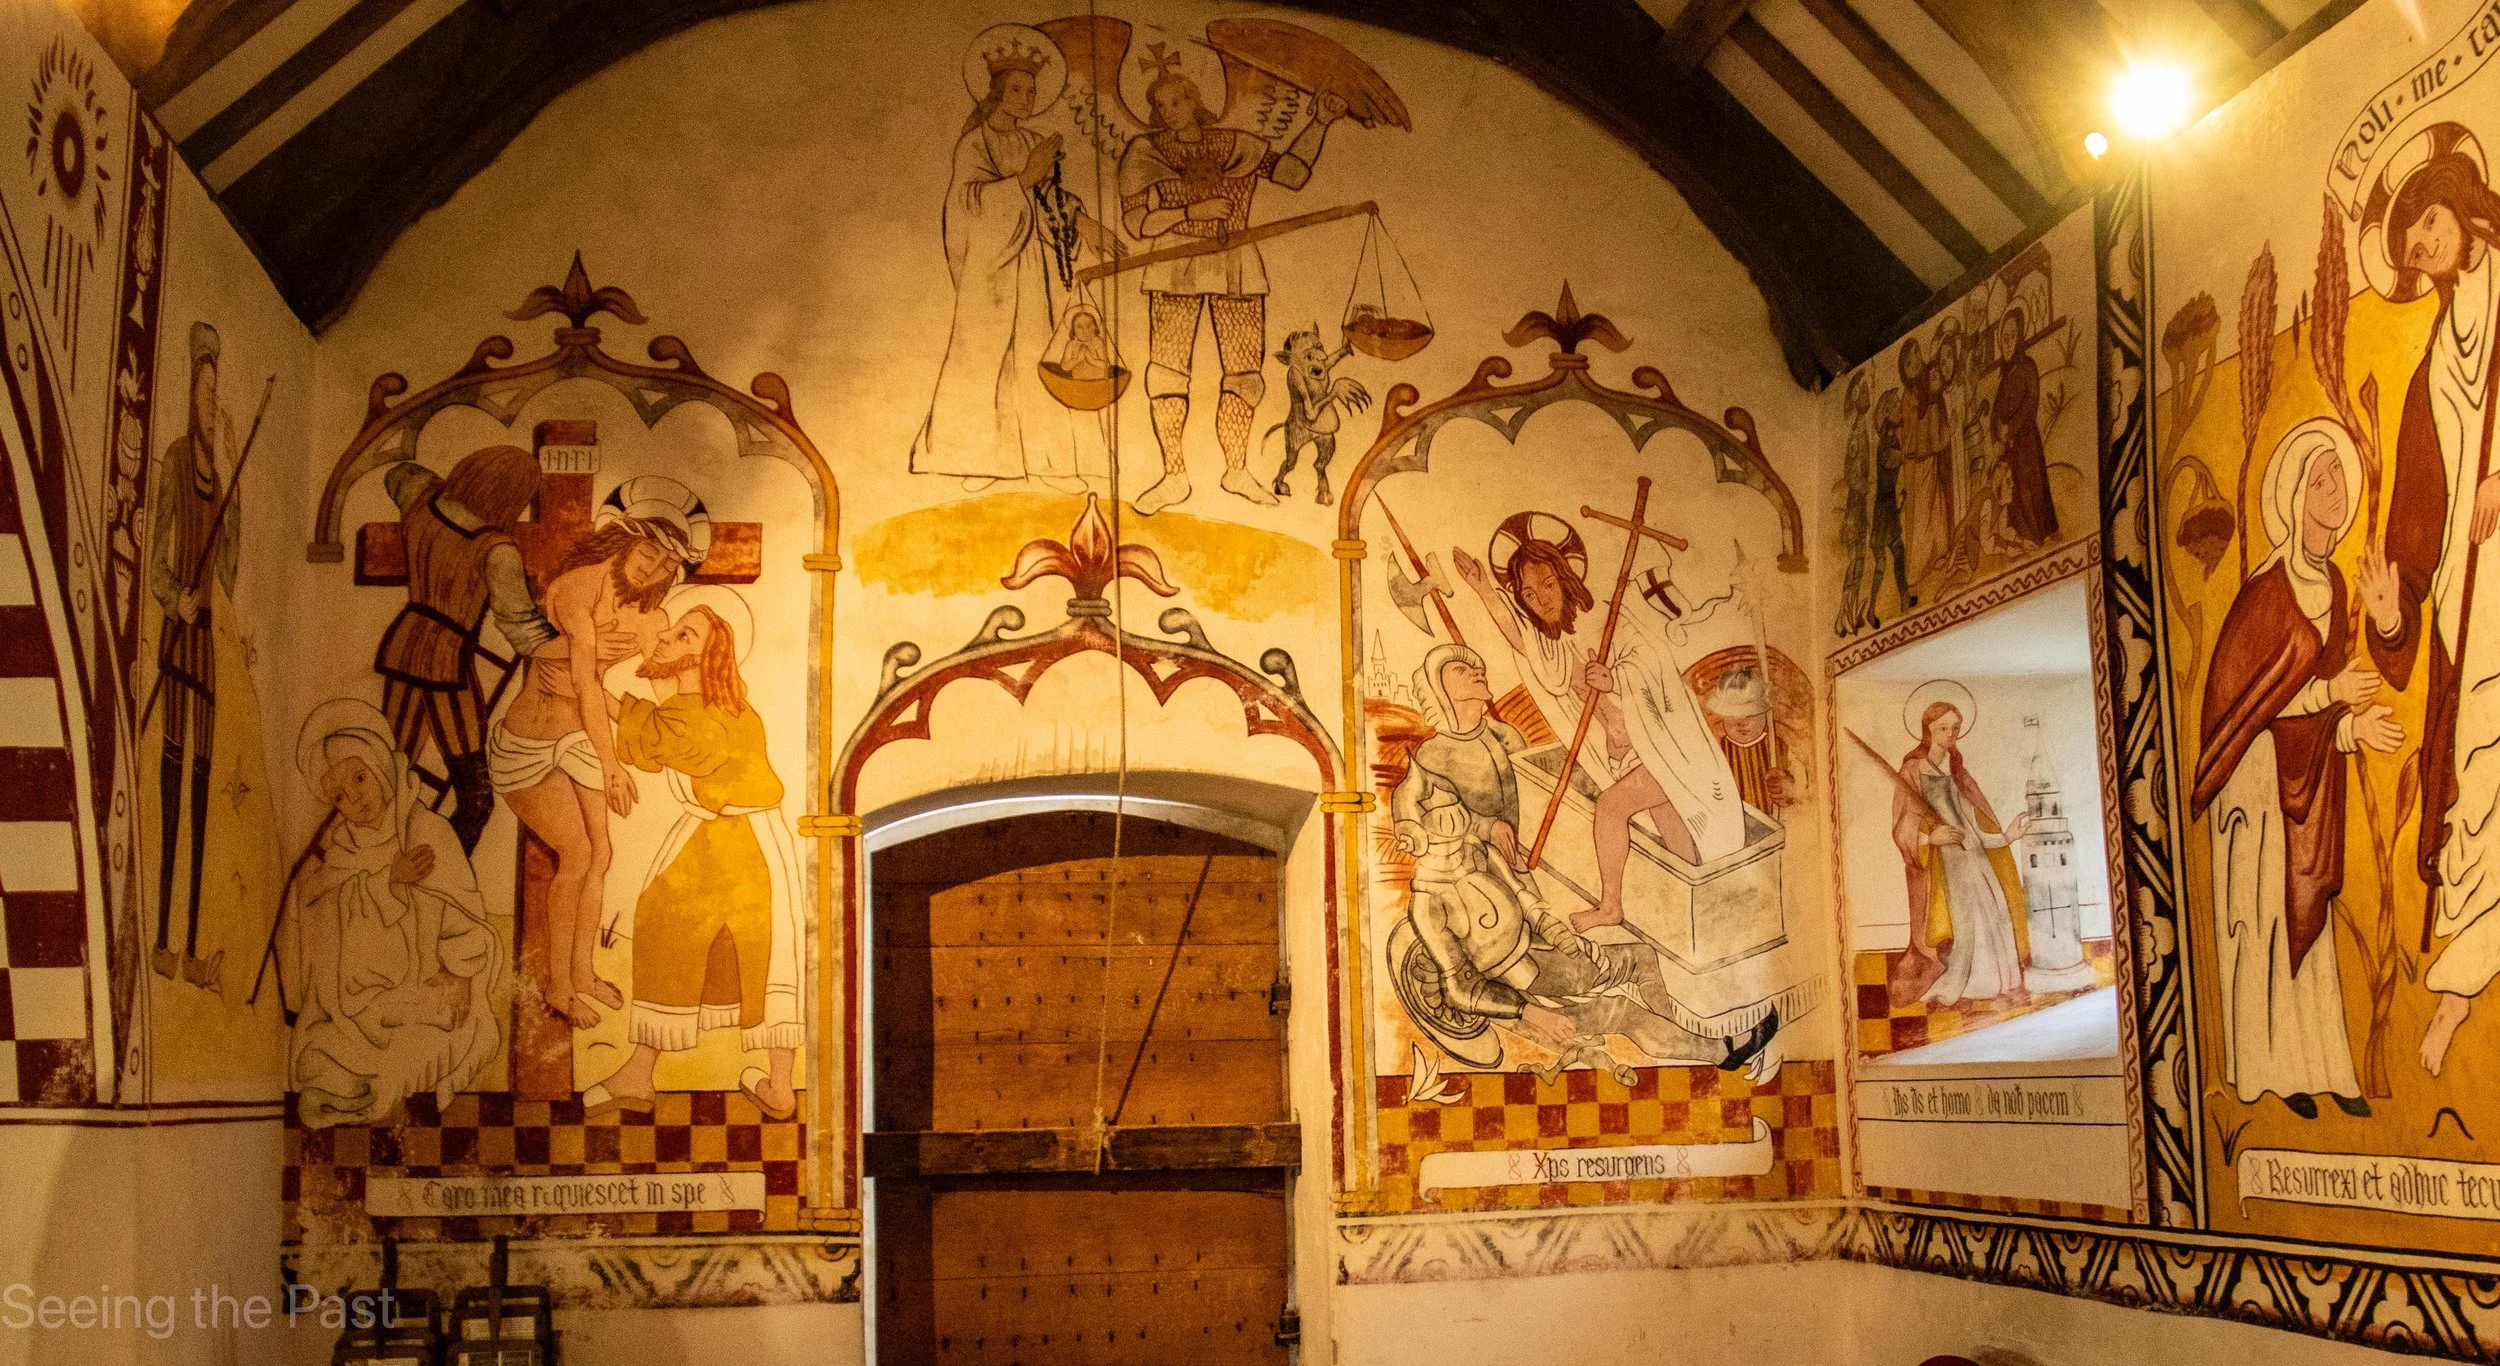


St Teilo’s Church, now lovingly re-erected within the open-air precinct of St Fagan’s Museum of Welsh Life, is a remarkable testament to Wales’s medieval and 16th century heritage. Originally constructed in the early 16th century, this humble parish church was painstakingly dismantled, transported, and restored to its former glory — not least its dazzling wall paintings, which have been carefully recreated with scholarly precision. These vivid murals, brought back to life through meticulous craftsmanship, offer visitors a rare window into the devotional art and storytelling of the late medieval period. Stepping inside St Teilo’s, you’re transported back half a millennium, immersed in a world where faith, community, and artistic expression converged on plastered walls that still speak with vibrant colour and enduring power.